Archive for Author Becky Brillon

December 7th…74 Years Later

Remember Pearl Harbor

Another year has passed since Pearl Harbor was attacked on December 7th, 1941. President Franklin Roosevelt was absolutely correct when he said it would become a date that would live in infamy. Most of us have heard the beginning of the famous address to the nation: “Yesterday, December 7th, 1941 — a date which will live in infamy — the United States of America was suddenly and deliberately attacked by naval and air forces of the Empire of Japan.”

The speech is not long, less than eight minutes in length, but very few people who I have met in the past year have been able to recall the final two minutes of the speech, which I feel are very powerful words to describe United States history:

“As Commander in Chief of the Army and Navy, I have directed that all measures be taken for our defense. But always will our whole nation remember the character of the onslaught against us.

No matter how long it may take us to overcome this premeditated invasion, the American people in their righteous might will win through to absolute victory.

I believe that I interpret the will of the Congress and of the people when I assert that we will not only defend ourselves to the uttermost, but will make it very certain that this form of treachery shall never again endanger us.

Hostilities exist. There is no blinking at the fact that our people, our territory, and our interests are in grave danger.

With confidence in our armed forces, with the unbounding determination of our people, we will gain the inevitable triumph — so help us God.”

infamy speech

What FDR phrased as the “unbounding determination of our people” is the essence of The Greatest Generation. The rationing rules and War Bond sales on the home front were considered the duty of all in order to prove the resolve of the country. They were called to serve at home, and serve they did.

In the name of those who died at Pearl Harbor, women went to work in the kitchen, in war production plants, at Red Cross volunteer campaigns, in scrap metal drives, at church gatherings to support Blue Star Mothers and young widows, and on and on.

Man Size Job

Americans’ way of living was drastically affected between 1941 and 1945. The sacrifice of war was carried by all.

Purl Harbor

Sugar bowls were nearly empty. Every scrap of paper used to wrap meat and sandwiches, tin from cans and ounce of grease from frying was recycled for war needs.

Lessons from WWII food rationing remain untaught in my kitchen. The past year of living aware of the rules and being mindful of the differences between 1943 and 2014 is still interesting to me. There remain many more things to write about.

Thankful

wwii-rockwell-freedom-want-posterNorman Rockwell’s Freedom from Want painting is an iconic Thanksgiving scene of generations gathered around the dining table with a golden brown turkey as the focal point. The painting served an important purpose to keep Americans focused on the rewards of sacrifice that couldn’t be far off.

Thanksgiving meals during WWII had traditional elements similar to modern day dinners. The November 1943 Health For Victory Meal Planning Guide outlined a special meal for the day:

Roast Chicken with Gravy, Southern Corn Bread Dressing, Mashed Potatoes, Wartime Cranberry Sauce, Green Beans in Creamy Sauce, Enriched White Bread, Butter or Fortified Margarine, Eggless Pumpkin Pie, and Cream Cheese Topping.

Turkey has never appeared in any of the WWII magazines or cooking pamphlets I’ve collected. The way we think of a full bird turkey now – an occasional meal for special holidays – was how families viewed chicken back in the 1940’s. All of the folks I interviewed for this project mentioned that chicken was a special meal, served less than six times a year. And for the family that could not find a chicken for the table, they turned to the field for a goose, duck, pheasant…and possibly a wild turkey.

From the menu in the wartime planner, I focused in on two recipes: Wartime Cranberry Sauce and Eggless Pumpkin Pie.

Wartime Cranberry Sauce:

1 c. light corn syrup

1 c. sugar

1 3/4 c. water

4 c. cranberries

Boil corn syrup, sugar and water together 5 minutes. Wash cranberries and drain. Add cranberries to the syrup and boil – without stirring for 5 minutes. Remove from heat and allow to cool in the saucepan. Makes 1 quart of sauce.

Eggless Pumpkin Pie:

2 c. pumpkin

1 c. brown sugar

1 c. milk

2 tbsp. cornstarch

2 tbsp. all-purpose enriched flour

1 tsp. lemon extract

1 tsp. cinnamon

1 tsp. salt

1 tsp. pumpkin pie spice

Mix all ingredients together and pour into 9-inch pie shell. Bake at 450 degrees for 10 minutes, then reduce heat to 350 degrees and bake 30 minutes longer.

Cream Cheese Topping:

1 pkg. cream cheese (2 oz.)

1/4 c. sugar

1/2 tsp. vanilla

1/8 tsp. nutmeg

2 tbsp. top milk

Cream cheese, ether in an electric mixer or in a bowl with a fork. Add all ingredients and beat well. Very good on gingerbread, apple or pumpkin pie.

IMG_20151125_102713236[1]


Victory in the Garden

ww2-poster_uncle_sam_says_garden_to_cut_food_costs

The temperatures have hit frost twice and freezing once now. I took some time a couple of weeks ago to tuck the Victory Garden in for the winter. After pulling out the last of the kale plants and tomatoes, I emptied and carried in the rain barrel and spread the compost bin over the whole thing. The trees cooperated and kindly dropped their leaves on top. Nice and snug.

It wasn’t until very recently when I stumbled upon a March, 1943 Woman’s Day magazine at a used book sale that I realized the correct measurements of a true Victory Garden. The interview with an Office of Information US Department of Agriculture spelled it out clear — 30 x 50 feet for a small garden, done in two plantings.

Pole Snap Beans, Pole Lima Beans, Tomatoes, Chard Lettuce, Beets, Carrots, Turnips, Cabbage, Onions, Radishes, and Spinach in the spring. After harvesting beans, plant three rows of turnips. In late July when lettuce is gone, plant 1/2 row of carrots. After harvesting beets, carrots and turnips, plant two rows of Collards. After harvesting cabbage and onions, plant three rows of beets. When radishes and spinach are gone, plant two rows of beans. Ideally rows should run north to south.

IMG_20151115_094206869

Did you catch that — ‘small garden’?  My garden measured 30 x 10 feet. And that was a double in size from before the War In My Kitchen project began. I didn’t come nearly as close to the variety of plantings the government requested of me (Peas, Beans, Tomatoes, Kale, Lettuce, Beets, Pumpkins, Potatoes, Cucumbers, Dill). There’s always next year…which is what us gardeners start to think about on the first snowy days in January.

Americans did their part to follow the recommendations of the government. 20 Million Victory Gardens were planted during the war years, accounting for 30%-40% of the demand for vegetables, nearly 10 million tons all planted and harvested by hand, prepped by women in their war kitchens.

From my garden to the canning shelf in my basement, I have preserved Dill Pickles, Pickle Relish, Salsa, V-8 Juice, Spaghetti Sauce, Diced Tomatoes, Apple Pie filling, Applesauce and even a little horseradish (a little goes a long way!).

IMG_20151115_095059967History shows that we were more than willing to turn the farming back over to the farmers at the end of the war. Food shortages remained in 1946 because people stopped gardening and turned to grocery stores. Agriculture was adjusting planting and harvesting techniques learned during the war years and transportation from farm to store were lagging. Boom time was coming and freedom from want was ending, but we had to readjust our planning and producing towards for our own first. Times were changing.


Time to Make the Birthday Doughnuts

Edith Berndt


My Great Grandmother, Edith was born on October 7th 1902. The photo above was taken in 1944 while my Grandfather was home on Christmas furlough between basic training and his entry into the war – first stop, Battle of the Bulge.

A farm family of seven children, the youngest born twenty years after the oldest when my great grandmother was 42 years old. The baby is only eight months old in the photo.

I remember Great Grandma as a frail, but happy lady. She was always smiling and took incredible joy in visits from all of her children, grandchildren and great-grandchildren.

She passed away when I was four years old and I can remember being at the cemetery for her burial. I remember her so well because my mom often drove me and my brother to their home between supper and chores to check in. They lived only a few miles away on an old farm. Helmuth Sr Home

Autumn especially reminds me of Great Grandma. Their front room smelled liked fresh picked apples in the fall. They would store bushels and bushels of them there all winter since it was unheated and kept them cool enough to last.

I stalled out on Great Grandma’s birthday recipe. She is the origin of the pie crust recipe my mom uses, but I wanted to bake something that was in her handwriting. For the most part, I had assumed she was one of those cooks that baked from memory. I had trouble sourcing recipes from her when I put together the family cookbook. After it was printed though a family reunion turned up her doughnut recipe and some good memories. I was delighted to get the recipe, in her handwriting written on a card to another family member.

IMG_20151012_192323_136

Grandma’s Doughnuts

1 C Sugar

2 Eggs. Beat this with spoon.

1/2 C Sweet Cream

1 C Buttermilk, add:

1 tsp. Soda (to Buttermilk).

1 tsp. Baking Powder to 1 cup Flour. Add to first part.

3 cups Flour, but not all at once.

1/2 tsp. Nutmeg (McNess – HeHa!)

1/2 tsp. Salt in Flour

Mix well, but not real stiff.

Put flour on board and fold dough over and over to form a ball. Pat and then roll 1/2 inch thick and cut out. Fry in Spry or Crisco. Melt this in a frying pan so pan half full of melted. Drop piece of bread or a little doughnut ball to test if it is just hot enough to brown. And you can save this and use it over again. Say about 350 degrees and turn as soon as they come to top and then turn again until other side is brown. I think you’ve seen me make these before. It makes three dozen. The little balls make three dozen more.

2945-MMS-1444696650970-attachment1-IMG_20151012_190843600


2941-MMS-1444696641500-attachment1-IMG_20151012_190925258

2940-MMS-1444696639431-attachment1-IMG952015101295190930066

Her letter goes on to talk about the postage rate going up to 13 cents (making the letter written in 1975). She also talked about the crops – Army worms were in the grain and had to be sprayed. The field was turning golden and the corn was so high they could no longer see the neighbor’s farm.

Happy Birthday Great Grandma! I know your farm in Heaven has an even more beautiful view (without Army worms). Edith and Helmuth

An Apple (or Bushel) A Day

August and September brought an abundance of apples. Off of our two little trees planted only two years ago, we harvested 21 pounds of Miniature Red Delicious and Wolf River varieties. I specially planted the Wolf River to honor my Great-Grandmother Mabel Crook who wrote in a family heritage narrative to describe the many types of apples growing in their apple orchard in Green Lake Wisconsin, “There were Snow, Talman Sweet, Jonathan, Wolf River, Greening and Macintosh.”

IMG_20150907_094713442

IMG_20150907_094739532

IMG_20150907_095414779

In addition to the apples we picked from our yard, a friend gave us all the windfall apples they could pick too. Needless to say, we had enough apples for lots of WWII style creative storage!


First up, washing everything. I used a sink full of water mixed with a cup or two of distilled vinegar to rinse the apples.

IMG_20150829_134017787

I started out with canned Apple Pie Filling.  It’s best to start by making the syrup. While it cooks you can core and peel the apples…lots and lots of apples.

IMG_20150907_112729098

IMG_20150907_110747624

When I had the jars stuffed full of the apples, I poured the syrup into the jars and then processed.

IMG_20150829_134035555

IMG_20150829_145006018

This recipe will need cornstarch added when I open the cans and use them. Cornstarch is not canning stable, according to the USDA.


Once I had finished a full kettle of Apple Pie Filling, I switched over to Applesauce. I added brown sugar to the apples and boiled them down. Next, I put them through my mill and added a little bit of leftover syrup.


IMG_20150829_153701005

Even after all of the canning, I still have leftover syrup. I’m saving it in my refrigerator to add to apple juice in small batches to make spiced apple cider.

IMG_20150829_161846525


Recipes:

Apple Pie Filling

  • 4 1/2 cups white sugar
  • 1 tablespoon ground cinnamon
  • 1/4 teaspoon ground nutmeg
  • 1 pinch ground cloves (optional)
  • 2 teaspoons salt
  • 5 cups water
  • 3 tablespoons lemon juice
  • 6 pounds apples, peeled and cored

In a large pan over medium heat, mix sugar, salt, cinnamon, cloves and nutmeg. Add 5 cups water and mix well. Cook and stir constantly until sugar is dissolved.

Stir frequently, boiling until mixture is thick and bubbly. Remove from heat and add the lemon juice.

Fill jars  halfway with sliced apples. Then pour liquid into jars to about one inch from the top of the jar. Ladle the syrup over the apples, then add more apple sure to leave at least 1/2 inch of room between the filling and the jar top to allow for a little expansion.

Slide a thin plastic, silicone or wooden knife around the sides of the jar to remove air bubbles, then put the lids and rings on the jars.

Add a few cups of cold water to your boiling water bath to equalize the water temperature to the temps of the filled jars and place jars in the boiling water, making sure there is enough water to cover the jars with at least a 1/2 inch of water.

Bring canning water to a rolling boil. Once the water is at boiling, let the jars sit for 25 minutes.


Applesauce

Put about six cups of cored and peeled apples into Dutch Oven. Add about a cup of water or apple juice. Add juice of one lemon. Add 1/2 cup of brown or white sugar and about 1 T of cinnamon (to taste). You can also add ground cloves, allspice, or ground nutmeg — whatever you like! Stir the pot well and then cover for about 25 minutes.

At this point, you may be done! Or, you may want to put your apples through a mill or blender…whatever you prefer. Decide if you’d like to eat it right away or in smaller batches throughout the next year by processing in a water bath.

You Say Tomato…I Say Sauce

Another week has gone by and the counter has filled up with more good things from the Victory Garden.  IMG_20150828_143714529

I planted two types of tomatoes in the spring — Better Boy and Cherry. Both types were planted from seed, something I haven’t tried before because it takes an incredible amount of patience to wait for tomatoes to come up while the ones in the store are about to turn red even before frost is over and all you have to do is plop them in the ground. But, the funny thing was the seeded tomatoes I planted were ready to pick the same week as the store-bought in other people’s gardens.

Now that the sun is baking the yard every day, I am picking about three Better Boys and a dozen Cherries every day.  Every. Day. That’s about 2 dozen large tomatoes by the end of one week and let’s just say roughly a million small ones in the same time.

So off I went to track down some good canning recipes. Salsa and Whole Tomatoes made the short list, but I settled on Spaghetti Sauce and Tomato Cocktail Juice.

For the Spaghetti Sauce, I used the Basil-Garlic Tomato Sauce recipe from the Ball Canning website. Key is to use lemon juice or citric acid in the recipe to keep it from spoiling during storage. I also learned I didn’t cook it down long enough. I simmered my recipe for an hour, but I should have gone 2-3 hours. As it cooled in the jars, it separated and became watery; still good, but not nice and thick like the really good stuff.

IMG_20150830_092107184

For the Tomato Cocktail Juice, I used a trusted recipe from Oscar, a dear family friend of my Aunt Carol. He shared his very best recipes and tips with Carol before passing away a few years ago.

Here’s Oscar’s recipe:

1 Kettle Cut-Up Tomatoes

2 Stalks Celery

1 Bay Leaf

2 Onions

1/2 Green Pepper

Parsley Flakes

2 T Salt

2 T Sugar

2 T Lemon Juice

Cook until tender, about one hour. Put through a strainer and reheat. Bring to a boil again for about 30 minutes. Put into jars and seal. Process in hot water bath for 30 minutes. Keep water hot, but not at a rapid boil.

Carol adds carrots as well.

The best part about this recipe is that it used up both types of tomatoes. I boiled both down really well and then ran through my Omega juicer (one luxury of convenience I wish my grandmothers could have had!!).  The juicer removed the seeds and skins completely, leaving juice and a fair amount of pulp.

While I’m being honest about my shortcut here, I’ll also confess that I did not cook down the onion, green pepper, celery or carrots. I juiced them after I ran the cooked tomatoes through. I’ve never tried juicing an onion or green pepper before, but it turned out fantastic and cut a lot of time off my finished recipe. I had been at the tomatoes for three hours by the time I got to the Tomato Cocktail Juice. So, if you wonder how I could stray off my WWII rules…yeah, don’t ask!

The end result is amazing. I am picky about tomato sauce. The only brand I buy is Hunt’s. The Tomato Cocktail Juice comes so close to the taste of Hunt’s Tomato Sauce that I’ll likely use it instead of Hunt’s and enjoy the added value of the other vegetables.

Drink Their Tomatoes

Give Us This Day Our Bread & Butter Pickles

home pickling

Cucumbers. It’s August and all I have on my mind is how to use up all the cucumbers. Even though my garden didn’t produce all that many (something about a powdery mildew), my parents’ garden back on the farm in Wisconsin is churning out cucumbers — about 25 a day.


So far, we’ve eaten each our own fair share of cucumbers raw, on a salad, in a cucumber & vinegar salad, and juiced.


We’ve spent a day pickling them into dill pickles. And, when there is not enough time, energy and sterile jars, we’ve turned them into Refrigerator Dill Pickles or Bread and Butter Pickles.


IMG_20150720_162719554

First Up — Refrigerator Dill Pickles.

My Grandpa “Doc” (blissfully married to his grade school sweetheart – my Grandma Barb), is credited with this family gem of a recipe.


You’ll need a plastic pail (traditionally we use an ice cream pail, but I’ve started bringing home the big plastic Folgers Coffee containers from work – couldn’t see throwing them away!). To the pail, add a few heads of Dill, 3-4 cloves of garlic, a chunk or two of an onion quartered. Then, cut several (6-8) cucumbers into spears (or “chips”…however you’d like them cut). Toss them in the bucket with the dill, garlic and onion. In a pot on the stove, bring to a boil 6 cups of water, 2 cups of white vinegar, 1/2 cup canning salt (or a little less if that seems like a lot to you), and 1-2T pickling spices (I love the Watkins brand for pickling spices). Once the pot comes to a full rolling boil, pour it into the bucket of cucumbers. Put the lid on and put them in the refrigerator for a day or two before eating. They keep very well for a long time in the bucket, in the refrigerator.


You can tell the recipe is not an exact science. No two buckets turn out tasting the same. Some batches are too salty, some are a little bland, but…when you get the perfect batch – stand back!


So, you still have cucumbers left? No worries.


Bread and Butter Pickles

Cut up several cucumbers into thin slices. Place them in a stove top pan along with 1 tsp. salt, 1 thinly sliced onion, ½ tsp. mustard seeds, 1 C white sugar, ½ C distilled white vinegar, ¼ tsp. celery seed, ¼ tsp. ground turmeric.

IMG_20150728_170050464

Cook all together until cucumbers are tender and the onion is translucent. Transfer to sterile containers. Seal and chill in the refrigerator until serving.

IMG_20150728_170155830

These last a very long time in the refrigerator, but you can also preserve them in a canner if preferred. I’m not sure how long a very long time is; we end up eating them up until Thanksgiving-time and then they are usually devoured completely while waiting for the turkey to cook that day.

bb pickles

Of Course, I Can!

Of Course I Can

At the height of summer, produce from the 20 million Victory Gardens planted yielded 9-10 million tons of harvest. Everything needed to be canned and stored. The average homemaker covering a factory position put in 12 hours, six days a week and still had hours of canning when she got home.

Canning, preserving, processing, “putting up”, was becoming a lost art compared to what was done in the first World War, on farms, and through the 1930’s. The 1940’s home maker was often referring back to instructions and methods used by her grandmother. Canning almost skipped a generation back then; it surely has skipped several generations in present day. Convenience wins out. And, I think some of us are scared off by the warnings about what happens when it’s done wrong.

I turned to my Aunt Carol to teach me the right (safe) way of water bath canning. My mom was there too picking up the routine. The biggest lesson learned was about streamlining the process. An unorganized operation will not work.

Starting out with cucumbers and dill, we went about making dill pickles. Carol’s recipe is from Oscar, her dear friend. We’ve held on tight to Grandma Crook’s Liberty Pickle and Sunshine Pickle recipes, but for our favorite — it’s Oscar’s recipe.

IMG_20150807_133515066_HDR

We lined up a bushel of pickling cucumbers through an Amish neighbor. One bushel weighs 48 pounds and is equal to 16-24 quarts of pickles in jars.

My mom and Carol spent hours scrubbing the cucumbers clean. The jars were sterilized in the dishwasher, the lids and bands were placed in boiling water on the stove, and our canning kettle with water boiling, all waiting.

IMG_20150807_133605853


On a table, we lined up tubs: one for sugar, one for canning salt, one for alum. We had vinegar, garlic cloves ready, onion chunks, and dill waiting.

Step one: Place two sprigs of dill, one chunk of onion and two cloves of garlic in each jar.

IMG_20150807_131748812


Step two: Pack the jars as full as possible with the cucumbers.

IMG_20150807_132932020 Step three: Add to each jar 1 T canning salt, 1 T sugar, 1/2 tsp. alum, and 1/2 C white vinegar.

Step four: Fill the remaining jar space up to 1/4″ from the rim with water.

Step five: With a damp cloth, trace the rim of each jar and then place a lid on each. Put a band on each, but do not tighten the bands.

Step six: Place jars in the canning kettle, with about 1″ water over the tops of the jars. Let the jars boil in the kettle until the water in the jars start to bubble. About 20-25 minutes.

IMG_20150809_203701292

Step seven: Take the jars out of the kettle and tighten the band.

As the jars cool, you’ll hear that wonderful “pop” that tells you things are going well. If the jars don’t make that pop, they aren’t sealed and then you have to eat up! You won’t be able to store unsealed pickles for more than two weeks. Ideally, the first jar can be opened after two months of storage, but pace yourself – what you put up in August has to make it until next August!

IMG_20150822_080203874

I added a couple of jars of horseradish and beets to this picture. We’ll see how that experiment ends the next time I bake a ham. Stay tuned on that!

Beautiful shelves of canned fruits and vegetables were something to be proud of in WWII… and still are!

vintage-canning

Waste Not.

Stop Waste
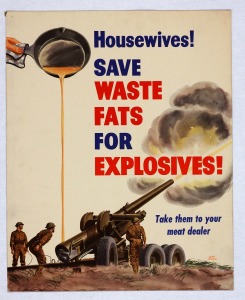
An overriding value of the WWII project is about avoiding waste. Whether the value was learned through the years of The Great Depression, or through government facilitation, it has always been clear to me that people alive during WWII were conscious about waste. Their efforts made them selfless in our minds and to them each following generation seems indulgent and living with a growing sense of entitlement.


About waste in general, I turned to a valuable timeline found on the Association of Science – Technology Centers site.


1927: John M. Hammes, an architect in Racine, Wisconsin invents the InSinkErator® food disposer in his basement. It is patented in 1935, a year when only 52 models sold.


Why is that important, you may ask. Well…think about it. 52 garbage disposals installed; do you know of any modern homes without a disposal these days?


There was a real problem at the company ten years later, as their salesforce was still trying to figure out how to sell disposers. They just weren’t necessary for the small amount of kitchen waste produced.


After WWII though, 18 competitors of InSinkErator arrived on the scene. Times were changing.


In the early 1900s, Americans were estimated to waste 80-100 pounds of food per year, per person. Can you believe we are now tossing 20 pounds per person, per month? That’s 100 pounds in 1900, 240 pounds in 2015.

What has made this change? Availability. Convenience.

Convenience came in the form of several inventions:

1914 – Wax Paper

1928 – Cellophane

1929 – Aluminum Foil

1930 – Plastic (polyvinyl chloride) and polystyrene

1937 – Nylon, the world’s first synthetic fiber

Waste Fat

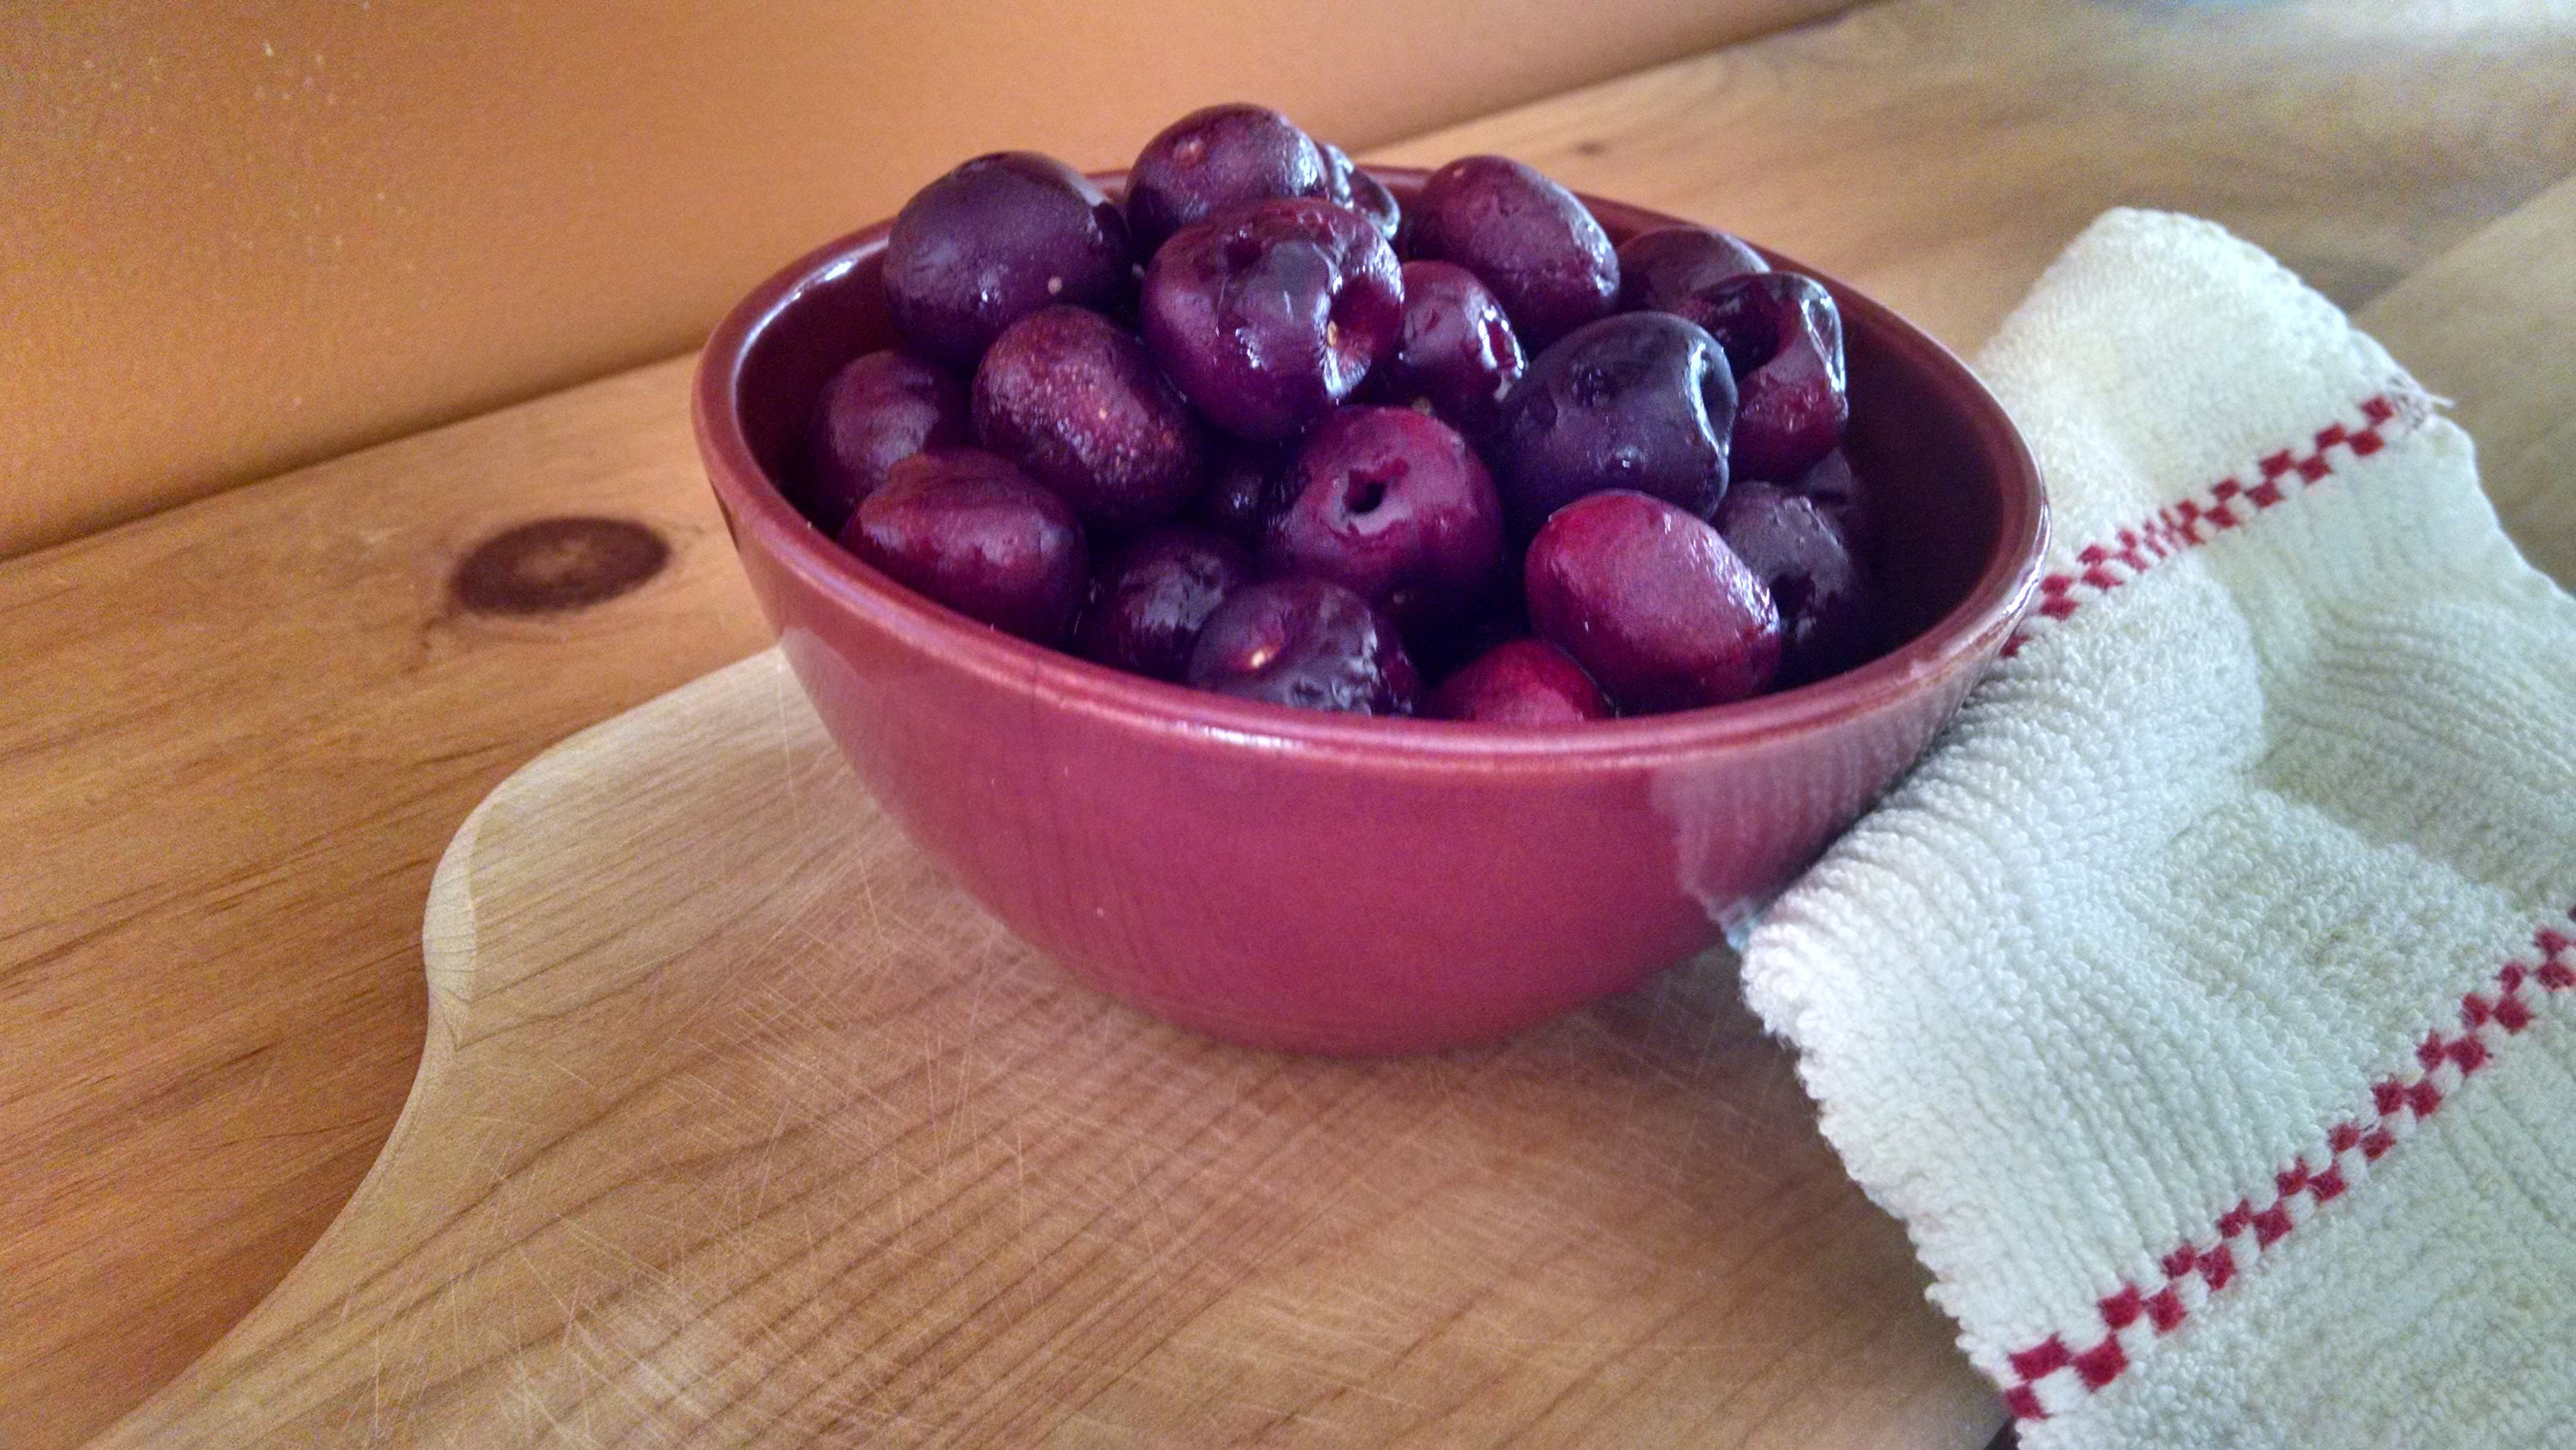
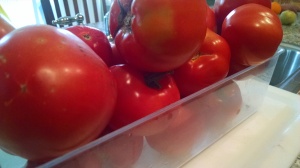
Before such inventions, we were only able to take what we could eat. We weren’t able to store food easily so we better judged what we really needed. I can give an example. Today I reluctantly tossed out a half full clamshell of grape tomatoes to the compost that had gone beyond their safe ripeness. I don’t do this absent-mindedly. I think about what I did that led to such waste. I realized it’s about size and portions (the American way!). The clamshell held about a 1 ½ pounds of grape tomatoes — roughly 60 of them. Realistically, there’s no way we would have eaten that many grape tomatoes. We have learned to buy for size, without thinking if it’s really what we need…value is in the bigger package, right Sam’s Club and Costco?


Speaking of packaging, I’m having trouble with the local grocers. They have a real problem with me not allowing them to wrap household items in plastic before putting in my bags with my other items. Never mind the fact that most of what we buy is wrapped in heavy plastic, slid inside a cardboard box. In the case of most household items (shampoo, soap, moisturizer, cleaning supplies), that are put on our bodies or countertops where we serve food, what is the problem if it comes near my food on its way home from the store?

Waste Paper

Anyway…back to waste. In 1947, J. Gordon Lippincott, an Industrial Designer of the time, made a comment on an observation he had made: “Our willingness to part with something before it is completely worn out is a phenomenon noticeable in no other society in history. It is soundly based on our economy of abundance. It must be further nurtured even though it runs contrary to one of the oldest inbred laws of humanity – the law of thrift.”  That said in 1947, long, long before Apple phones are replaced every two years for the newer version with cooler features! Mr. Lippincott was actually referring to inventions such as disposable Bic pens and disposable Gillette razors. This type of waste just didn’t make sense.


Sadly, things only became worse as Americans became increasingly focused on consumerism.


1953: The American economy’s “ultimate purpose is to produce more consumer goods”. – Chairman of President Eisenhower’s Council of Economic Advisors.


“It is our job to make women unhappy with what they have.” – B. Earl Puckett, Allied Stores Corp.


1991: “Our economy is such that we cannot “afford” to take care of things: labor is expensive, time is expensive, money is expensive, but materials — the stuff of creation — are so cheap that we cannot afford to take care of them.” – Wendell Berry


1993: “We’re reminded a hundred times a day to buy things, but we’re not reminded to take care of them, repair them, reuse them, or give them away.” – Michael Jacobson, Center for the Study of Commercialism


By latest claims, Americans throw out 230,000,000 tons of trash (4.6 pounds per day) per person annually. Less than ¼ of that amount is recycled.


And back to food waste — it’s too much. 20 pounds per person, each month of food. Roughly 15% – 20% of what we buy we throw out.


Think about the additional waste of resources involved. According to author and food waste expert Jonathan Bloom, food waste is not just a moral issue, but also an environmental issue. “A tremendous amount of resources go into growing our food, processing, shipping, cooling and cooking it,” said Bloom. “Our food waste could represent as much as six percent of U.S. energy consumption.”


It comes down to winning the modern war against overabundance and consumerism.


Stores overstock. If the shelves or produce displays look empty we think there is something wrong with what’s left. No one wants to take the last head of broccoli.


Any produce slightly subpar is tossed before it even goes to market. The USDA standards of grading produce puts a farmer at loss. If something is a Grade 2, two-thirds of its market value is lost, even though taste and freshness is identical to a Grade 1. It’s all about aesthetics.


91% of consumers have tossed food for the reason it is past its ‘sell date’. There are no USDA health or safety standards on food expiration (except in the case of baby formula). The dates you see on food in a store is determined by manufacturer — someone who would have an interest in you tossing to buy again.


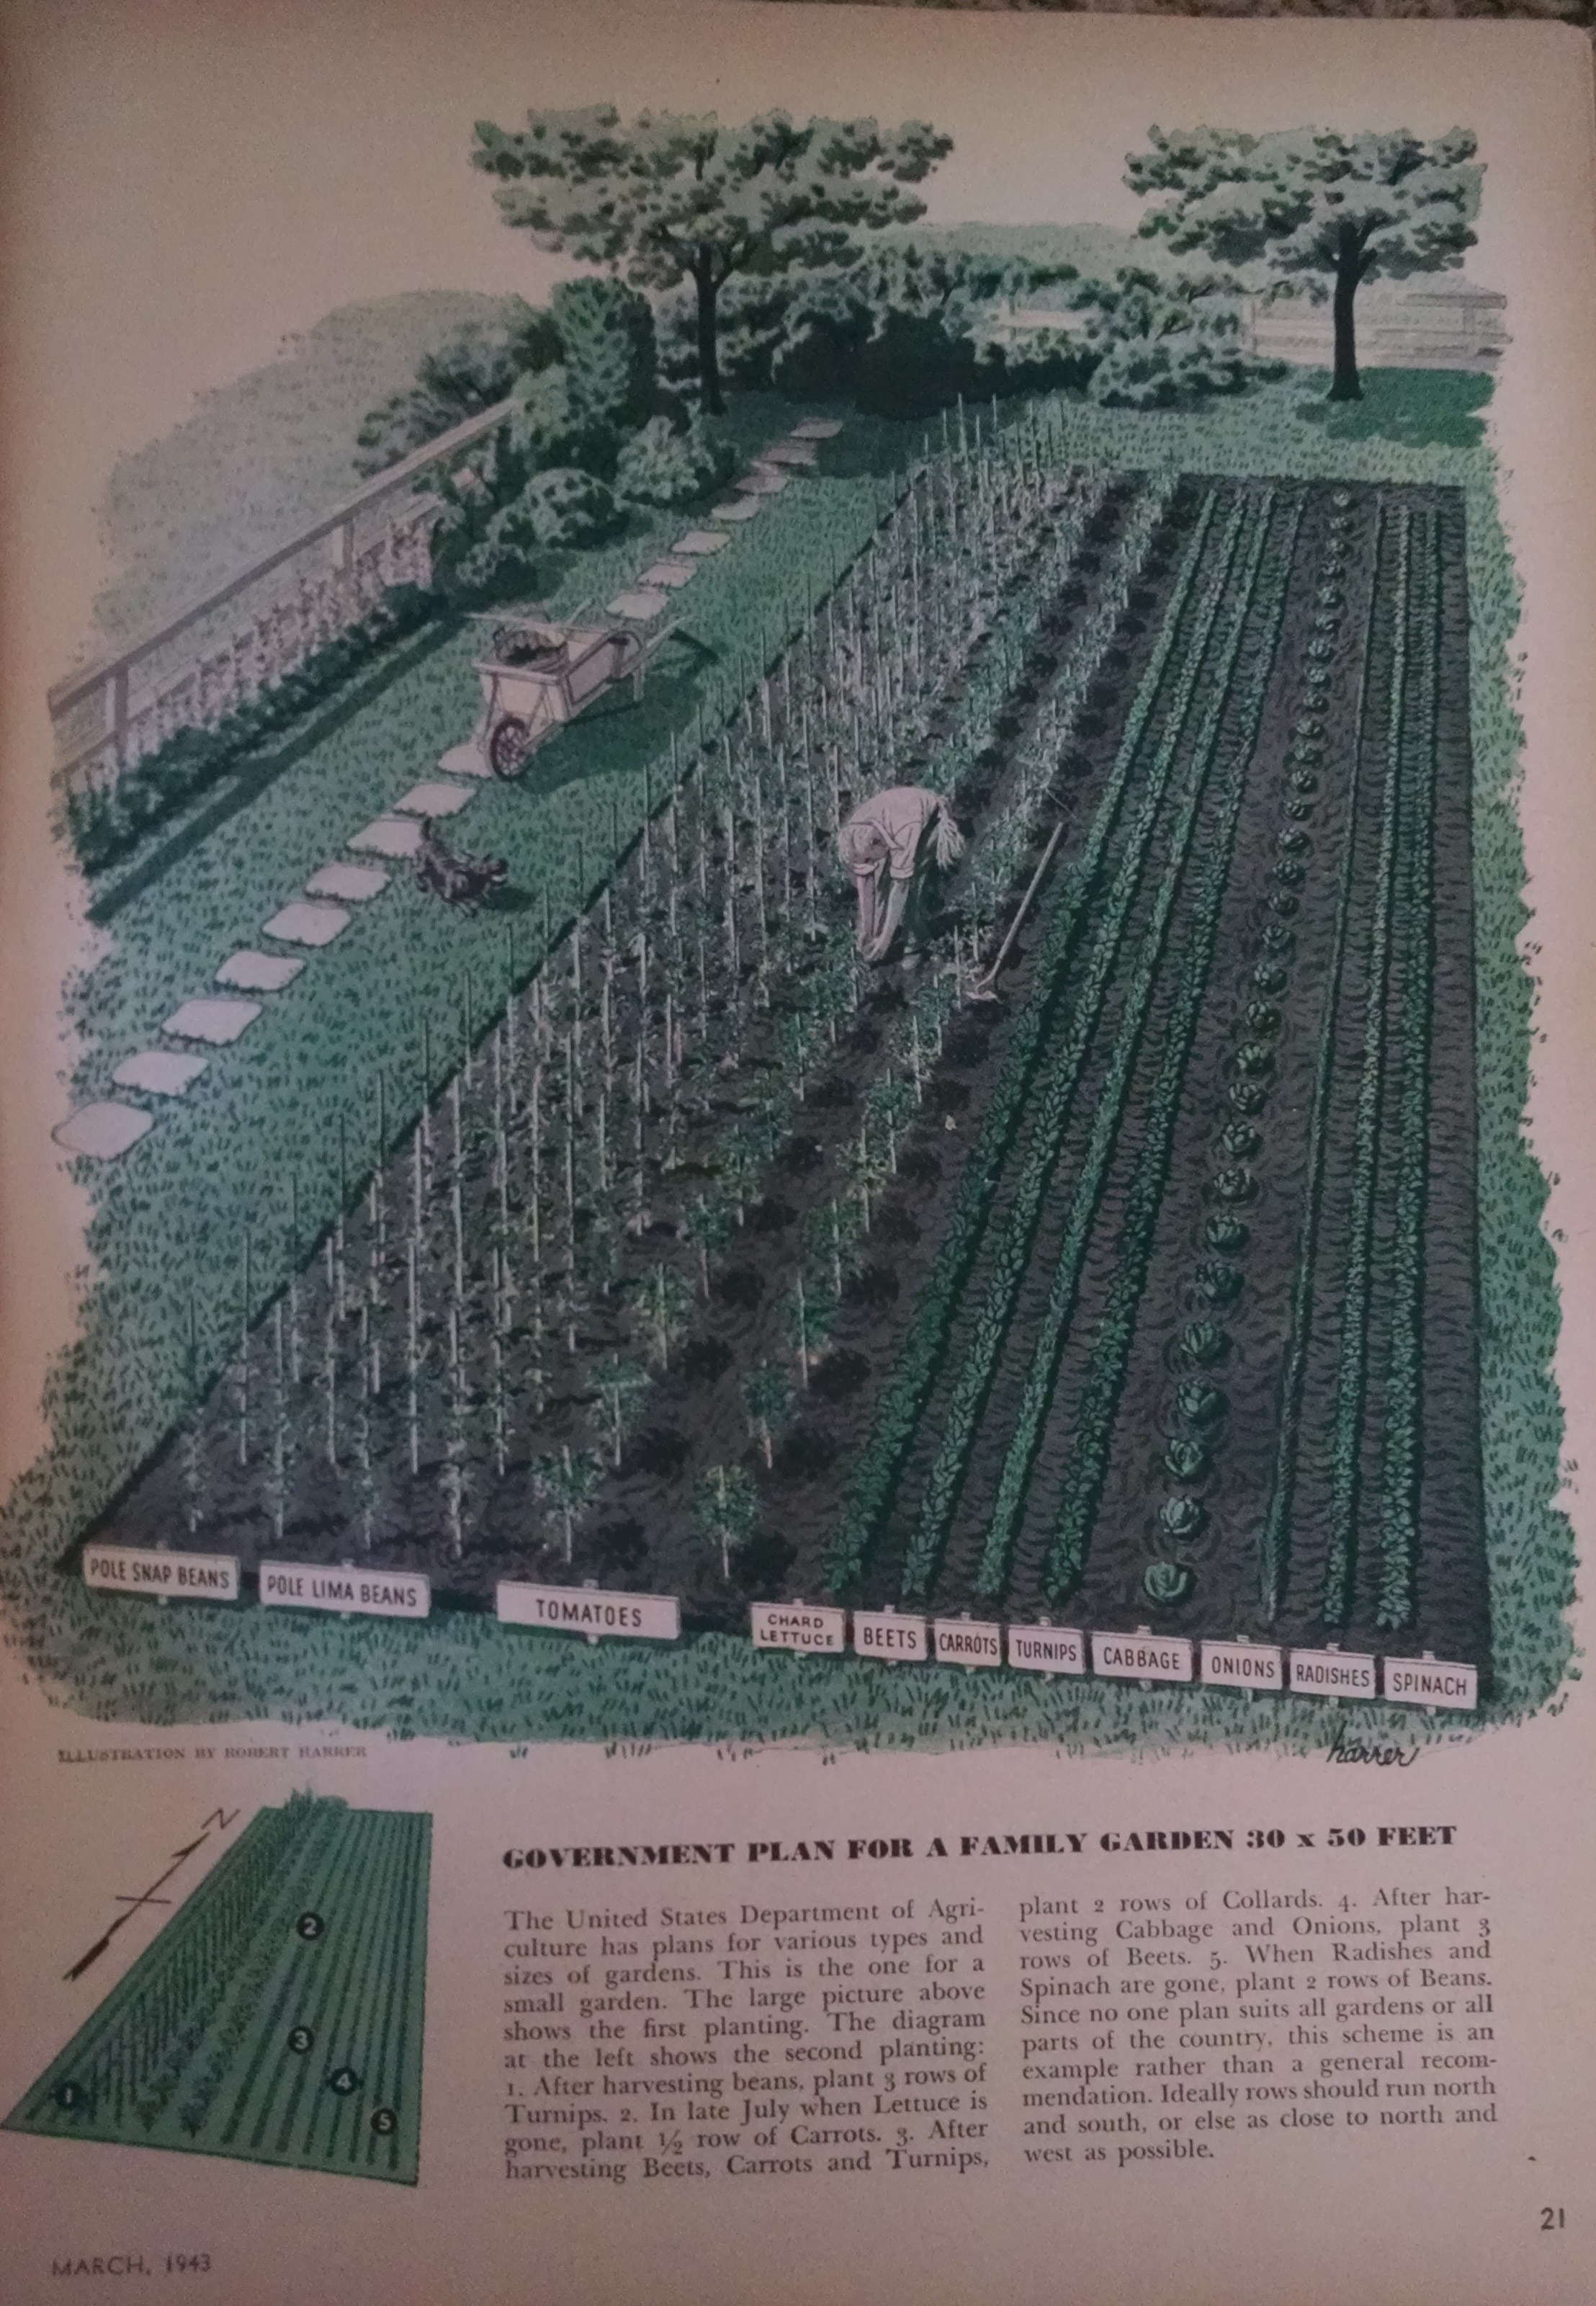
So, here we are in 2015…70 years since WWII and the food rules. ‘Living Green’ is popular…reduce, reuse, recycle feels like a hip concept to us. Don’t be fooled. The trend was a way of life, not a trend, until the end of WWII and we’re not even close to mastering it the way our grandparents did. This is one of those lessons we must hold on to.


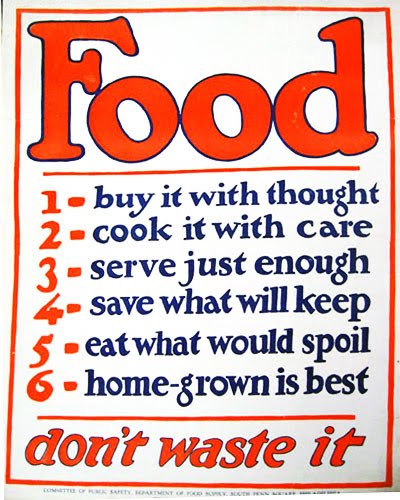
Don’t buy more than you need. Use what you buy. Reuse or recycle what’s left of packaging, if you can’t avoid packaging completely. Or, as they use to say – Use it Up, Wear it Out, Make it Do, or Do Without!

Food Waste

Ain’t That the Pits?

Summer is in full swing and with it comes excess of everything we’ll wish we had in the winter — fresh strawberries, raspberries, apricots, and cherries for now.

This morning’s task was pitting the cherries and I was excited to use a tool found at a recent estate sale: the Cherry Pitter or Cherry Stoner. It will answer to either name. Even with a fun new (old) tool, the project did still turn out to be a chore. And a messy one at that (Note to self: Post about aprons!)

I spent the time pitting the cherries thinking about how the tool must have changed over the years and did a little research.

So, here is my tool (note the cherry-stained fingers): IMG_20150719_153327814[1]IMG_20150719_153406378_HDR[1]


Another version I did not buy at an estate sale (*sigh*): Cherry PittererAnd one more that I would love to have to close out my cherry pitter collection (*sigh*): Cherry Pitter

I’m thinking about the people and brains over the years working on the problem of pits in cherries (or olives). It’s not one of our most pressing dilemmas; probably never was, but I bet more than once in many kitchens over the years it was a problem that some people took to solving. I think that’s pretty notable.

IMG_20150719_131044781_HDR


« Older Entries Recent Entries »