Archive for Use it Up

The Greatest Generation’s Advice for Stretching Meat During a Shortage or When You Can’t Get to the Store

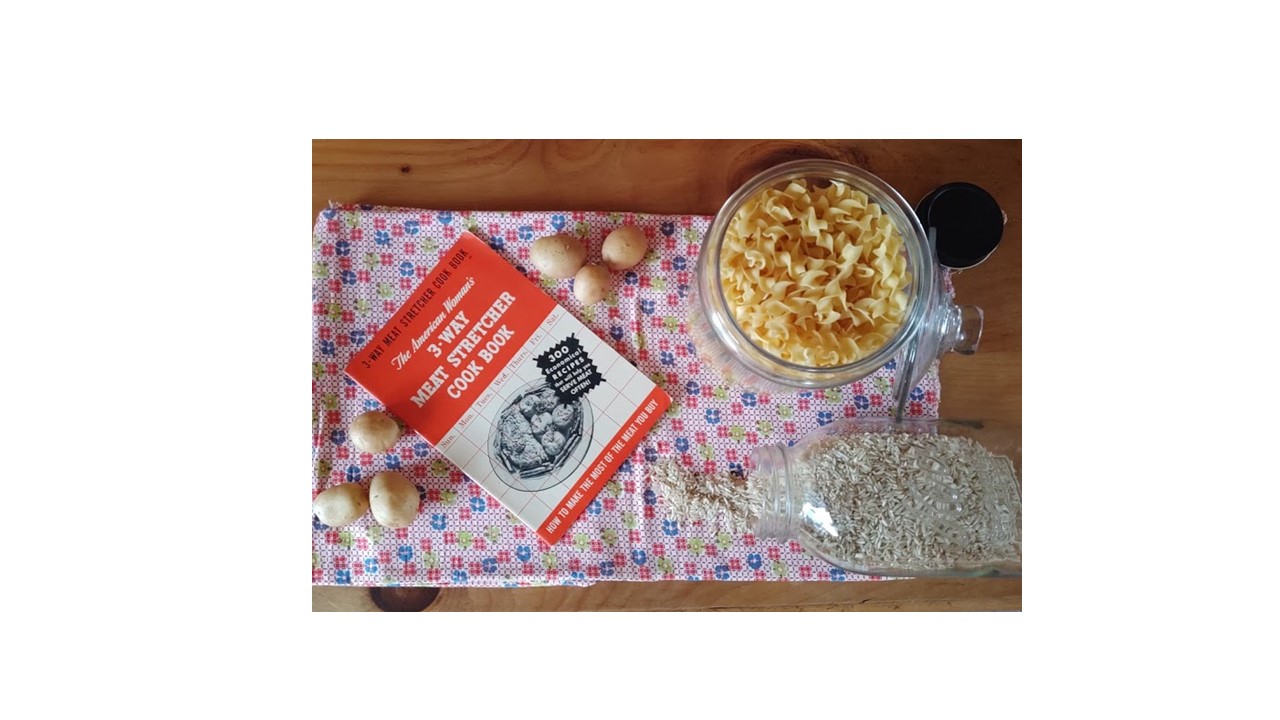
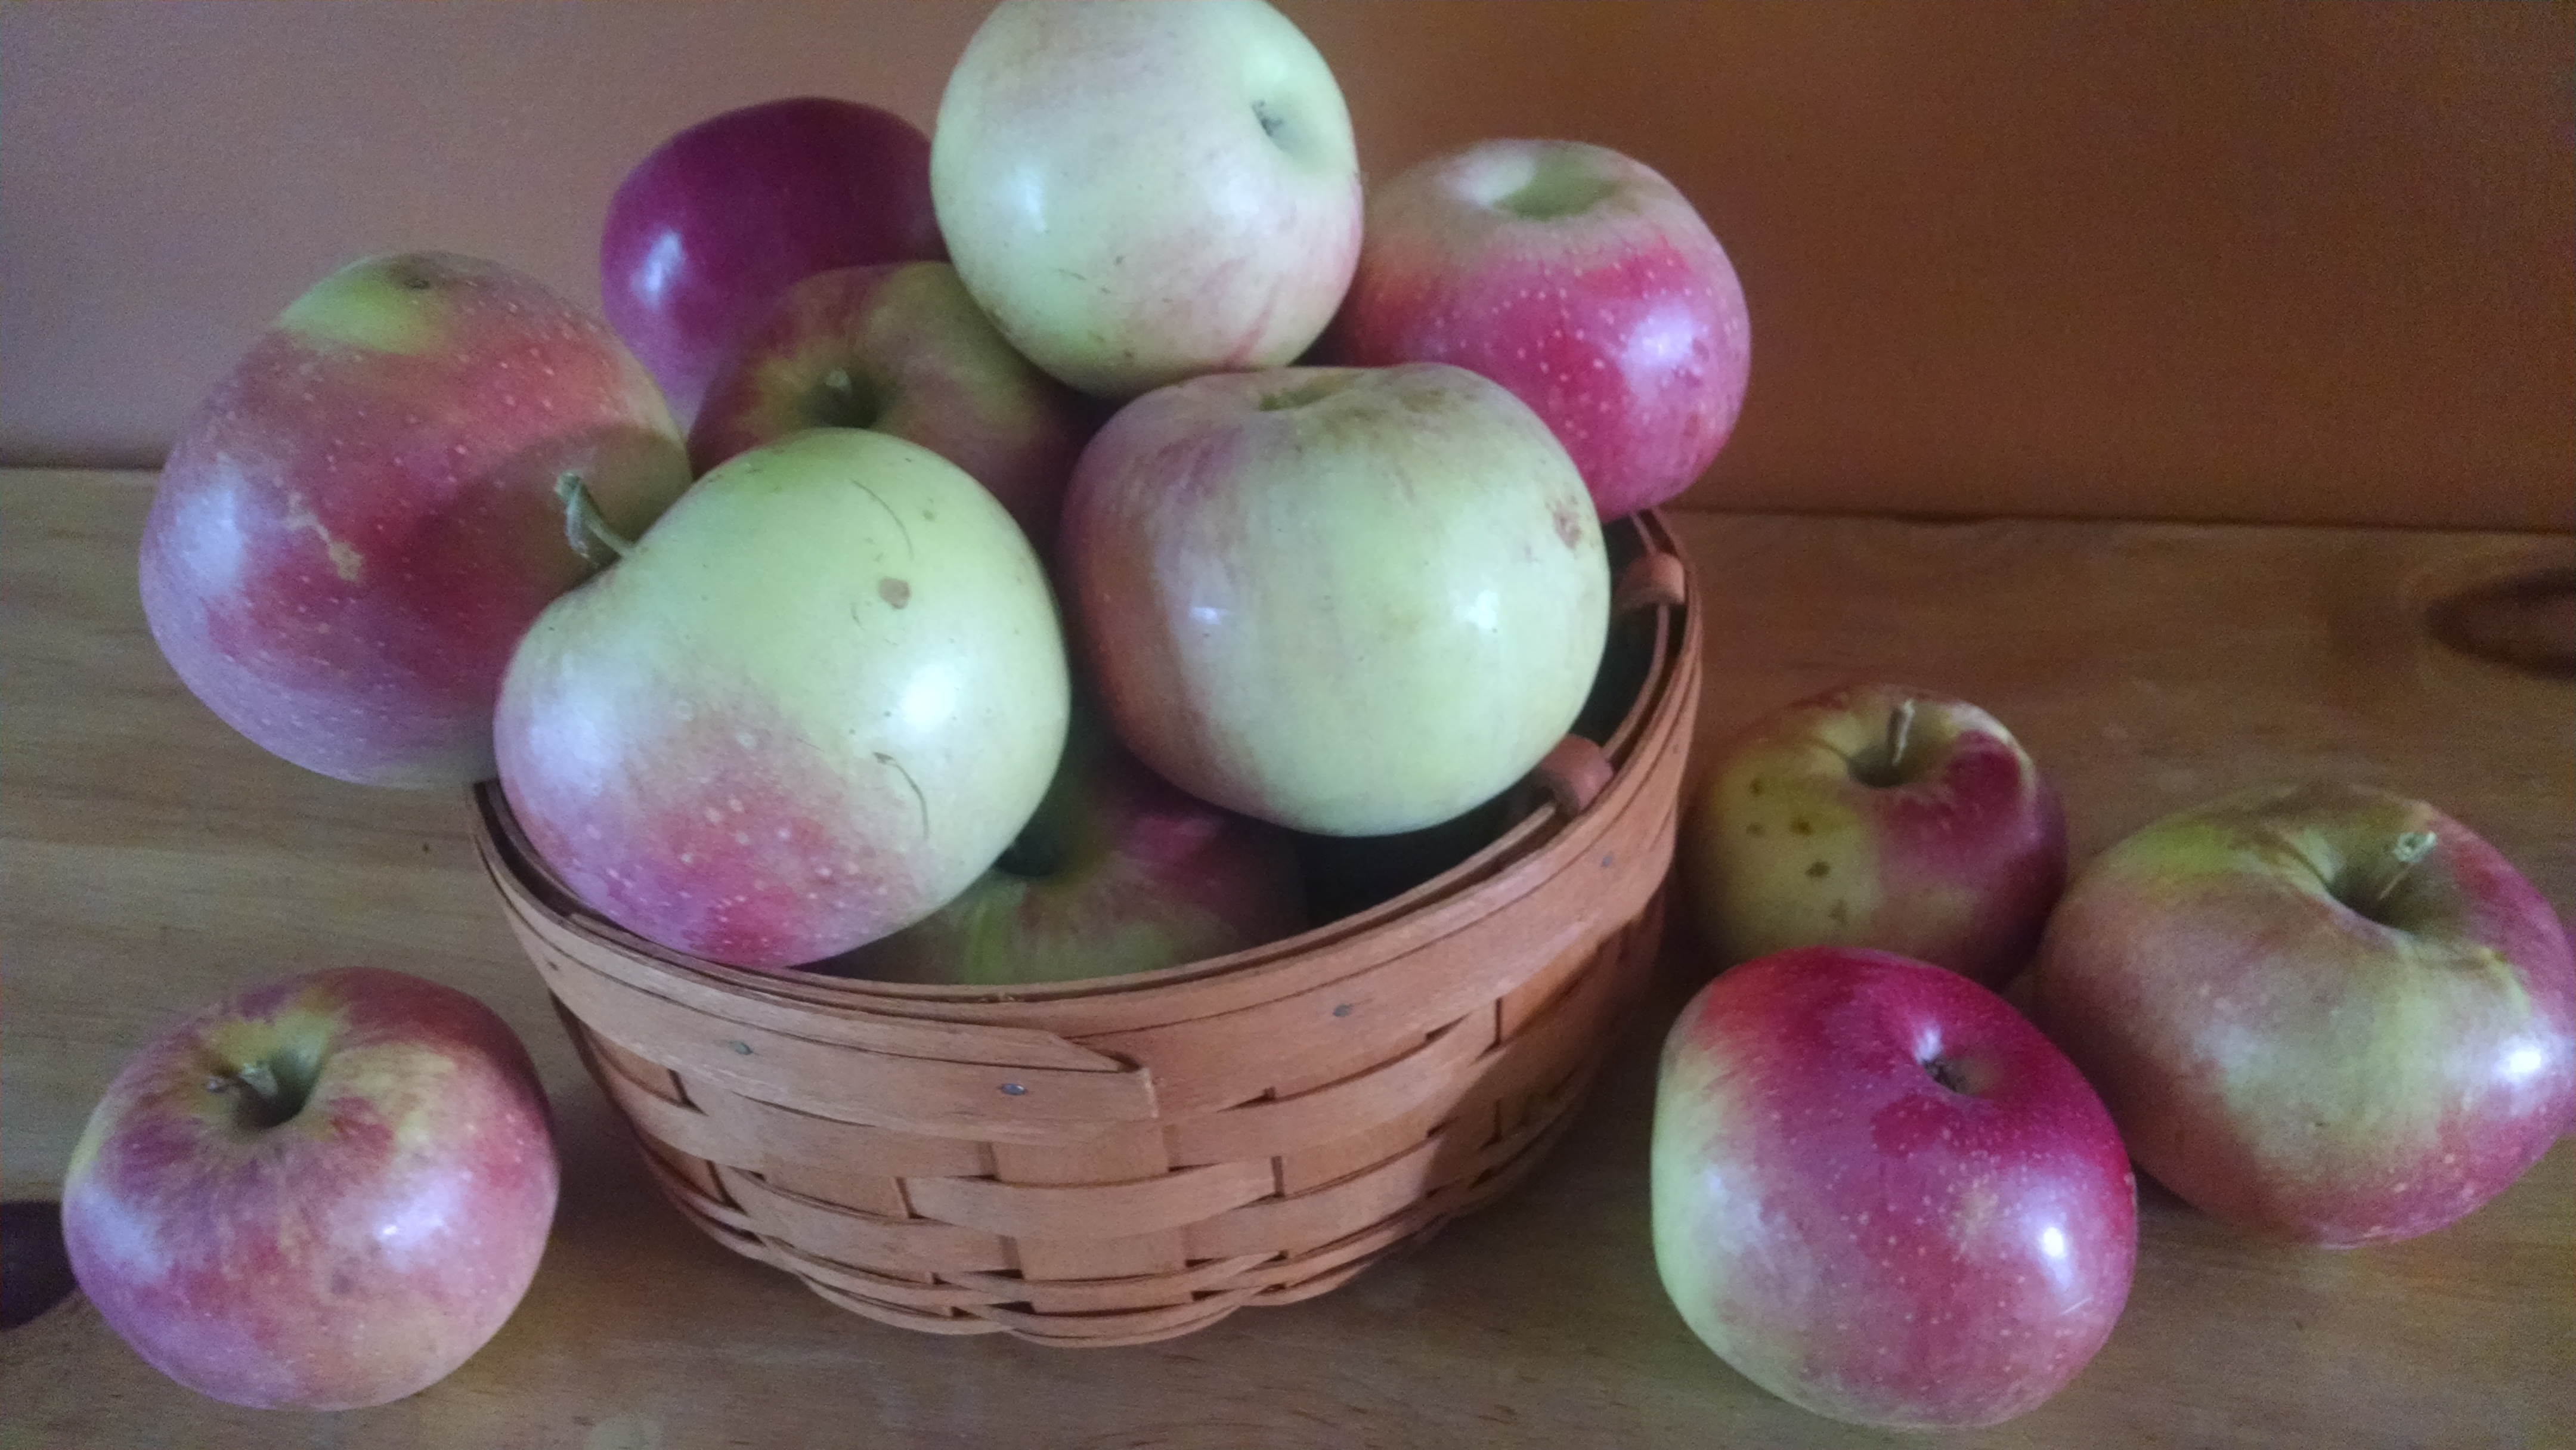
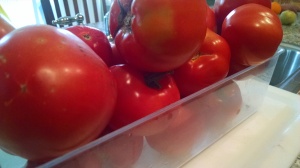
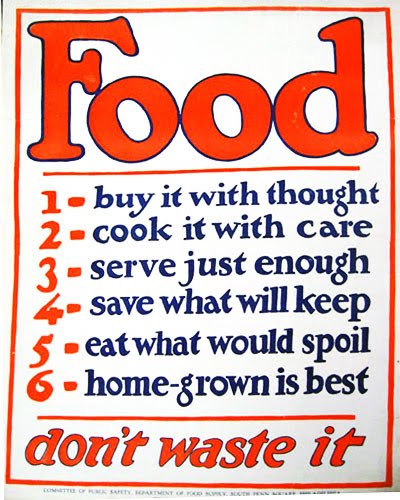
Our grandmothers have some advice for our Covid-19 food prepping and planning. Granted, Covid-19 is not the same as war, but scarcity is. It only took me one trip to the grocery store this weekend to realize that the words contained in WWII era cookbooks (when meat and basic staples were rationed) is part of the legacy of the women who kept things together on the home front.

The words below are from The American Women?s 3-Way Meat Stretcher Cook Book: How to Make the Most of the Meat You Buy published for the Culinary Arts Institute, edited by Ruth Berolzheimer and printed in 1943. Whether you are in a meat-shortage situation or trying to make what you have already purchased last a few weeks without leaving the house, these tips may help you think of basic ways to prepare meat and reuse leftovers.

It may sound difficult at first, but when you read through these tips you?ll see how a pound of meat could stretch over three meals by adding something to it to make a small amount more filling at each sitting. I?ll leave the challenge of Meat Gelatin and ?Variety Meats? up to you!

Ways to Make Good Use of All the Meat You Get

Be open-minded about using different cuts and kinds of meat. Try new ones. Be prepared to change your purchases to what the market offers. If you buy a roast be sure to have definite plans to use the trimmings and the leftovers.

Cooking Meat

Vary seasonings, especially when you use the same kind of meat often. Use a little onion, tomato or green pepper ? a dash of herbs or spices to give a different taste.

Serve attractively. Serve stews, ragouts or rechauffes in a meat pies, as a filling for hot biscuits, or scallop with macaroni, spaghetti or vegetables in a large or individual casserole.

Save all bones, leftover meat, drippings, gravy and meat stock for use in soups or chowders.

With Sandwiches

Sandwiches ? Use a variety of breads; add catsup, chili sauce, chopped pickle or salad dressings. Use plenty of fresh fruits and vegetables in season.

French-Toasted Sandwiches ? Spread ground cooked meat between bread slices, dip in egg and milk mixture and brown in hot fat in a skillet.

Hot Open-Faced Sandwiches ? Place slices of cold or hot meat on toast, bread or biscuits, top with gravy or savory sauce.

With Cereal

Loaves and Patties ? Combine ground meat with cooked rice, bread crumbs, mashed potatoes, cooked corn meal, oatmeal, cracked or whole wheat, or ground vegetables for quick top-of-stove patties or oven-baked loaves.

With Fresh Vegetables

Scalloped Meat: Fill baking dish with alternate layers of chopped cooked meat, or meat stew and cooked noodles, hominy, macaroni, crackers or vegetables; cover with sauce, top with bread crumbs and bake.

Meat Baked with Vegetables and Fruit: Put layers of shredded cabbage or kale and sliced apples in a baking dish, top with cooked sausage cakes, cover and bake.

Baked Stuffed Vegetables: Peppers, eggplant, squash, artichokes, cabbage, potatoes, onions, tomatoes or cucumbers may be stuffed with rice and ground meat or leftover meat and corn.

Chop Suey: Combine browned diced cooked meat with cooked celery, onions, mushrooms and soy sauce; serve with steamed rice or fried noodles.

Salads: Combine chopped cooked meat with vegetables and salad dressing; serve with lettuce, watercress, cabbage or other greens.

With Dumplings

Stews: Add sliced or diced vegetables to cubed meat cooked almost tender; top with dumplings.

With Gelatin

Jellied Salads: Cold diced meat with diced vegetables in gelatin make jellied salads. These are an attractive way to serve left-overs.

On Toast

Meat Broiled on Toast: Spread bread, toasted on one side, with uncooked ground beef or lamb; broil.

In Soups and Chowders

Soups and Chowders: Add vegetables with barley, macaroni, cracked wheat, whole wheat, spaghetti or noodles to soups and chowders made from meat trimmings and bones.

With Stuffings

Stuffings: Stuff boned breast or shoulder roasts, sparerib sections, chops, heart, ground meat roll or rolled strips of steak with bread, cracker, corn meal, fruit or vegetable stuffing.

With Dried Vegetables

Meat and Dried Vegetables: Combine ground meat with dried beats. Limas, split peas, marrowfat peas or lentils simmered almost tender; cook slowly until mixture thickens.

In Meat Sauce

Meat Sauce: Brown ground meat with leftover gravy or soup stock, onions and pepper; add tomatoes and serve over cooked macaroni, spaghettis, noodles, rice or potatoes.

With Biscuits or Pastry

Biscuit Squares: Spread seasoned cooked meat on squares of baking power biscuit dough, seal edges and bake.

Meat Pies:  Cover stew with pastry, biscuit rounds, mashed potatoes or corn-meal mush.

Turnovers: Fold filling of chopped cooked meat in rounds of pastry dough, seal edges and bake.

With Croquettes

Croquettes: Combine ground cooked meat with cooked rice; mashed potatoes or white sauce; shape; saute or bake.

With White Sauce

Timbales: Bake ground cooked meat, white sauce and eggs in custard cups.

Souffles: Ground cooked meat, bread crumbs, white sauce, egg yolks and beaten egg whites in a baking dish make a delicious souffle.

Creamed Meat: Serve chopped cooked meat with white sauce or gravy on toast, waffles, potatoes, rice or macaroni.

In Hash

Hash: Dice cooked potatoes with chopped meat, onion and gravy; saute in cakes or cover skillet and turn like an omelet.

Peanuts and Peanut Butter

Mix chopped roasted peanuts with carrots or other chopped vegetables for loaves or croquettes.

Use peanuts with meat, tomatoes, sliced onion and other vegetables in scalloped dishes and in salads. Combine peanut butter with chopped crisp vegetables, chopped dried fruit, jelly, jam, honey, salad dressing, chopped pickles or hard-cooked eggs for sandwich fillings.

Blend peanut butter with pureed tomatoes for soup.

Thicken hot milk with peanut butter for sauce for scalloped or creamed rice, macaroni, potatoes and other vegetables. Add peanut butter to omelet.

If Variety Meats Are New to You

Variety meats such as liver, kidneys and brains are excellent sources of many vitamins and liver is important for blood building.

Liver: Scallop with potatoes, crackers rice, macaroni or noodles; make into loaves, patties or dumplings; or mash for sandwich spreads. Be careful not to overcook.

Kidneys: Broil or scramble with eggs; or make into stews.

Heart: Simmer a long time in moist heat and serve with onion gravy; stuff or slice and braise; or use chopped for meat loaf.

Tongue: Simmer and serve sliced, hot or cold with an interesting sauce; scallop with vegetables; scramble with eggs; or mince for salad spreads.

Sweetbreads: Parboil, dip in egg and milk mixture and brown in fat; pour melted fat over parboiled sweetbreads and broil; serve creamed on toast, croustades, biscuits or muffins. Parboiled and combined with vegetables and nuts, sweetbreads make a delicious salad.

Brains: Serve breaded and fried; creamed on toast; in croquettes; or scrambled with eggs. They can double for sweetbreads in salads.

Tripe: Cook tripe until tender, dip in batter and saute; brush with fat and broil; or serve creamed on toast. Use in pepper pot and chowders.

Spleen and Lungs: Simmer and use in stews or with heart in stews and loaves.

Poultry is America?s Sunday Dinner

Chicken, turkey, duck and goose have long been favorites with everybody. Stuff and roast young well-fattened poultry in uncovered roasting pan in moderate oven. Pour clear fat into jars and use for meat cookery.

Stuff and braise older birds or lean young poultry in covered roasting pan.

Fricassee: Brown cut up poultry and either simmer in added liquid in covered utensil or bake in oven until tender. Make plenty of gravy. It is a favorite extender.

Oven Fry: Fry chicken until thoroughly browned; transfer to covered roasting pan and bake in moderate oven.

Salads: Combine diced cold chicken with celery, lettuce or other greens and mayonnaise. Fruits and vegetables may be added.

Stew or steam less-tender poultry, to make tender. Cool in broth; or add dumplings or noodles to stew and cook tightly covered. Cream cooked poultry cut from bones; serve with rice or noodles, or on toast, waffles or biscuits.

Use chopped cooked chicken as the basis for loaves, croquettes, souffles or timbales, chop suey or hot sandwiches.

Serve sauted chicken livers on toast; giblets in gravy with rice, potatoes or on toast; chopped giblets mixed with fat for sandwich fillings.

Fish and Shellfish are Valuable Alternatives

Learn to use all the varieties of fish available.

Bake, broil, poach, broil or saut? fresh fish at moderate heat.

Use boned cooked fish in cakes, scalloped dishes, loaves, croquettes, chowders or salads. Extend with chopped vegetables, rice, mashed potatoes, spaghetti or white sauce.

Soak or parboil salt or smoked fish and serve in same way as fresh fish. Serve oysters and clams in stews, chowders or scalloped; saut? minced clams in fritter batter. Dip oysters in egg and crumbs and saute; scallop with cracker crumbs or rice; or heat and serve in white sauce on toast.

Serve shrimp in salad; French fried; poached in tomato sauce; broiled and dipped in cold sauce; baked in Creole sauce with rice; or scrambled with eggs.

Crabs may be steamed and served hot or cold; scalloped; made into small flat cakes and fried; deviled in shell and baked; or served in salad.

Alternate Main Dishes to Spare Your Ration Points

Use cheese, eggs, poultry, dried legumes, peanuts and soybeans. Like meat, these foods make a good basis on which to build a meal.

They all contain protein, plus one or more of the other food values found in meat, and usually have additional food values.

Hard Cheese is Rationed

Serve cheese with eggs in fondues and souffles.

Melt American cheese in white sauce and pour over cooked macaroni, spaghetti or noodles; use this sauce over vegetables.

Combine grated American cheese with white sauce or egg for rarebit.

Soft Cheese Does Its Share

Serve cottage cheese as main dish, baked with noodles, on greens, as salad or in sandwich fillings.

Cream cheese, Neufchatel, Camembert, Liederkranz, Brie and the Blue Cheeses are delicious. Use them for sandwiches, salads, desserts and for cheese trays with fresh fruit.

Eat Eggs Often

Serve eggs soft-cooked, hard-cooked, deviled, poached, saut?ed, baked or scrambled. Cook eggs at low temperature.

Combine hard-cooked eggs with macaroni, crackers or spaghetti, and cheese sauce, top with bread crumbs and bake.

Combine chopped hard-cooked eggs with salad dressing for sandwiches; or use scrambled eggs, hot or cold, with tomato sauce.

Combine eggs with meat, vegetables or cheese for souffles or timbales.

Poach eggs in milk, tomato sauce, meat or vegetable stocks.

Dried Beans and Peas

Simmer beans slowly in covered pan; or bake parboiled beans long and slowly with molasses, mustard, salt pork and onion. Save bean stop for soup.

Combine mashed cooked beans with milk, beaten eggs, bread crumbs and seasoning for loaves and croquettes.

Combine baked beans with onion, pickle, relish or tomato sauce and mayonnaise for sandwich fillings.

Soybeans

Cook dried soybeans and serve in the same way as other dried beans.

Press cooked dried soybeans through a coarse sieve or grind for pulp to make soup, croquettes, loaves, souffles.

Combine cold soybean pulp with chopped onion and salad dressing, milk or tomato sauce for sandwich fillings.

Cook green soybeans, shelled or in the pod; serve hot as vegetable or cold in salads.

An Army of 1.5 Million

Aside from talking to the people who lived on the home front or those who have stories from their parents, magazines and newspapers are my next best source of boots-on-the-ground information but it’s not especially easy to find these gold nuggets.

President Franklin D. Roosevelt formed the War Production Board (WPB) in early 1942 to “oversee the conversion of industries from peacetime work to war needs, allocate scarce materials, establish priorities in the distribution of materials and services, and prohibit nonessential production”. The WPB quickly launched nationwide scrap drives that were enthusiastically supported by civilians longing to help in any way to win the war and bring their loved ones home. Campaigns were organized on a city level to collect metal, rubber, kitchen fat, newspapers, rags, and so on.

The War Production Board smartly rolled out the Paper Troopers program, designed to sound like “paratroopers,” to involve schoolchildren in the effort. Troopers were awarded arm patches and certificates for collecting certain amounts.

And then they got called in the Boy Scouts of America.“In order to meet the paper requirements for our military and essential needs, we must save, collect, and move to the paper mills even greater amounts of scrap paper than before. We must do our utmost until the last knockout blow is delivered to the enemy. We again urgently request the Boy Scouts of America to expand and concentrate their efforts with a special nationwide collection of paper during March and April. The goal for the Boy Scouts – 150,000 tons. This amount will strike another potent blow for victory. I am confident the Boy Scouts have the courage and resolution to meet the goal.” – J.A. Krug, Chairman War Production Board. 

The little armies of boys went in for all — a campaign medal was on the line. By final count, 1,500,000 scouts and cubs were cited for “astronomical success” — too successful when it came to my beloved newspapers and magazines.  The WPB had to call a stop to the paper drives. They had no where to store 300 million pounds of paper!

And paper was only recycled as packing material.

“Awarded for extraordinary patriotic achievement in the Boy Scout General Eisenhower Waste Paper Campaign March – April 1945.”

The medal was awarded to individual scouts who collected over 1,000 pounds of waste paper. Imagine the competition in one small town where several scouts were vetting for your waste paper, hoping to make the 1,000 pound mark somehow!

So, you can see what I’m up against in my search for WWII era reading sources, unused cookbook pamphlets, letters, postcards, etc. When faced with the message that paper could bring your son home sooner, and when the army of one and a half million patriotic little boys pulling little red wagons shows up at your front door, it’s a wonder that any sheet of paper remains!

Earning the Home Legion Distinguished Service in Homemaking Medal – Part II

In earlier posts (here and here) we learned about the prestigious Home Legion medal for distinguished service in homemaking. I was incredibly fortunate to come into possession of a medal, but I don’t feel that I have ‘earned’ the pin until I have completed the steps that all original Home Legion members had to complete for the recognition.

Step one: Join the Home Legion by filling out the application. I shall check the boxes of ‘good meal planning, careful household management, thrift — preventing waste, maintaining morale, creating a happy atmosphere, and interest in and work for the community’.  Check!

Step two: Hang the Homemaker’s Creed on a wall in my kitchen. Check!

Step three: Answer the questions in the second round of mailings: “What do you do to insure a smooth-running home?”, “What little tricks do you use for saving time and labor?” and “How do you practice thrift in conserving food, household supplies, and equipment?”

What do you do to insure a smooth-running home? Short answer — simplicity and routines! Have you ever come across those cute flour sack towels with the day of the week embroidered on them?  Monday is Wash Day. Tuesday is Iron Day.  Wednesday is Bake Day. Thursday is Brew Day. Friday is Churn Day. Saturday is Mend Day. Sunday is Meeting Day. It goes back to the Mayflower and times when we needed to brew and churn.  Luckily, I don’t have to go that far back!  In McCall’s patterns of those towels, Thursday became Market Day and Friday became Clean Day. Other versions argue that Bake Day or Market Day should be Saturday.  Who knows for sure?

Anyway, there is an inborn tradition in me that makes Monday Wash Day. I grew up on a farm with rows and rows of laundry hanging on a clothesline — first load hung by 5:00 am on Monday morning! I do set aside time on Fridays for cleaning to make sure we start the weekend feeling tidy and organized. I like to make Market Day a Friday night event and grab dinner on the way home. That way Saturdays can be left for whatever we feel like doing and meal prepping can be done on Sundays for the week ahead.

Cleaning doesn’t seem so big of a chore when things are done as they need to be throughout the week too — dishes put in the dishwasher after meals are over. Bathroom sinks can be wiped clean after use as part of the morning routine. Before going to bed, the living room can be picked up if books, magazines, or other things were used through the day.

Little things like this only leave vacuuming, dusting, and other light cleaning tasks for Fridays.

Larger tasks and spring deep cleaning find their way to a list and scheduled like projects to be done when there is plenty of time to plan for and work on them.

What little tricks do you use for saving time and labor? We have lots of little tricks around our home for saving time and labor. The best have been locating general cleaning supplies used on each floor of our home (basement included) on each floor to save steps and make the routine flow. I am obsessed with planning efficiency and always study every task for any way of removing steps.  For example, when grocery shopping, I load my cart and then the conveyor belt with like items based on where they are located in my kitchen. They are bagged together in the same way and then when it’s time to put everything away, I can take my bag to the one area in the pantry or refrigerator or freezer where it all goes.

On meal prepping day, I locate all the ingredients for a recipe together in the pan or bowl I’ll be using to cook or bake it in along with the recipe card so all I have to do is pull out the bowl from the pantry, pull out any ingredients that were stored in the refrigerator or freezer, and take it all to the counter to assemble. All this planning goes a long way in reducing clean up time too.

How do you practice thrift in conserving food, household supplies, and equipment? Thrift always comes down to living the WWII mantra “Use it up, wear it out, make it do, or do without”.

We plant a garden. And in our home, food is prepped and frozen before it can go bad. If plans don’t go as first arranged, fruits and vegetables can be juiced very easily and efficiently. Berries not frozen also go into a smoothie or prepped into desserts.

Everything has a life cycle with several stages. Worn out t-shirts become dust rags. Tea towels act as cloth napkins — no paper towels or paper napkins in this house! We use cloth bags for shopping. Any plastic bags that accidentally find their way into the house are used as kitchen waste bags — we do not buy Hefty or any other kind of trash bags.  It really doesn’t make sense to pay for something that’s main purpose is to throw away! Same for paper bags – these are used for holding recyclable waste until they are tossed in the recycle bin (Waste Management does not allow plastic bags of any kind to be used in recycle bins).

Equipment in the house is carefully maintained. Wooden cutting boards and utensils are waxed twice a year to keep in good condition. Garden tools are cleaned and oiled at the end of each season. Kitchen tools are cleaned and dried right after a thorough washing to avoid rusting. We use a clothesline for drying clothes in warm seasons to extend the life of the dryer. We use (and reuse) glass jars and containers — no plastic! Knives are carefully used, stored, and sharpened when needed, instead of buying new.

January in My Kitchen: It’s All About Maintenance

The U.S. involvement in WWII passed four Januaries.  The first, in 1942 was just short a month from the Pearl Harbor attack and a few months before rationing began. The final January, in 1945, occurred while the Battle of the Bulge waged in Europe, nearing the end without the home front knowing it would thankfully be the last January of the war.

In my kitchen, each January marks the memory of my grandmother’s birthday on January 14th, aged 13-16 during the war. 

January also seems like a good time to maintain the things that need to keep in good working order to use up, wear out, and make do throughout the coming year. Here’s a partial list:

  • Gardening Tools: A spray of WD-40* on the tools I will rely on in a few long, cold months in the Victory Garden helps to protect them from rusting and splintering. It also helps in keeping parts moving smoothly and efficiently when spring arrives.


  • Cords, Cords Everywhere: There is a law in my house that prohibits anyone from throwing away any twist-tie from a bread wrapper or other form of packaging. And here’s why. I take a walk through my house, room by room, cupboard by cupboard looking for any electrical cord that needs to be neatly held with a twist-tie. Or, if in use and not able to be wrapped up, at least has a twist-tie attached to it for future use. You’ll be amazed at how well this little task saves on bent plugs, messy cupboards and rooms, and tangled messes. Any cord that does not have a home gets wrapped neatly, labeled to remind me what it once belonged to, and then stored all together in one spot for electronic cords.


  • House Maintenance: At the same time while I am going room to room looking for cords to wrap up, I also take a notebook and pen with me to make note of anything in each room that will need extra attention throughout the year — such as painting, deep cleaning, repair, or something added/removed to make it more appealing. Obviously, I’m a list maker and I appreciate seeing things getting crossed off, but this is also a way for me to budget time and money for home improvements no matter how big or small.


  • Wood: It is crucially important to maintain any wooden cutting boards and wooden handles of kitchen tools. I maintain at least twice a year, but for sure in January when the humidity in the house may be at its lowest. I use mineral oil or butcher block wax to condition all of the tools, then I give my cupboards a quick swipe with the oily rag to make the most of the used oil.


  • Recipes: As my WWII kitchen project progressed, I began to realize that I can become overwhelmed with too many recipes in front of me. I have one cabinet in my kitchen where I keep all of the recipes and monthly menu plans that work best for our home. As months go by I may add a picture of a recipe snapped from a book or magazine that once looked interesting. So each January, I lay out all the cookbooks, binders, and loose pieces that have accumulated and archive the ones never used. I think of recipes in the same way I think of items in my clothes closet. I tend to wear the same things over and over and by purging what I don’t wear I save time by not giving myself too many useless choices. When it comes to meals and the groceries that go with them, it’s easy to make choices quickly since any recipe at hand is a good one and likely to be one that I am able to keep ingredients on hand. What’s for supper? I simply open the binder to any page and make what I see.


For now, this list will make the most of my January and set me up for another year of war in my kitchen!


*Okay, okay… WD-40 was not invented until after WWII in 1953, but using plain oil as was common in households during WWII is frowned upon in my home for the same reasons that WD-40 is so widely popular.

It’s In the Bag


An ad from a late 1943 Woman’s Day Magazine reads:
There are two major ways that you can help s-t-r-e-t-c-h the paper supply:

1. By taking goods from stores unwrapped whenever practicable, and by using your own containers when possible.

2. By salvaging all types of waste paper – newspapers, magazines, containers.

Imagine a time when plastic bags were not even an imagined shopping convenience. While it is popular to use cloth bags now, it’s not as widely practiced as it should be. Have you ever stopped to think why it’s necessary to use a bag at all when you purchase one or two items from a store? Why the bag?

I’ve embarrassed my hubby again at the grocery store check out line. I bring my own bags and I insist that nothing be pre-wrapped in plastic before putting it in my cloth bags. The baggers frequently argue with me about the safety of wrapping meat, cleaning supplies, and non-edible items before putting them in my bag.

Here’s where I start to embarrass my hubby: I ask the bagger if he/she notices that the cleaning products are already contained in plastic bottles. And, not only that, but they contain an aluminum-type safety seal under their plastic top. Why would I need to triple-protect them in a plastic bag for the two-mile trip home? Meat is packaged; yeah, I get it – sometimes meat packages get messy from the meat counter it is stored in at the store. So noted. But, everything I buy is wrapped in its own plastic and/or box. It still does not come in direct contact with another item that is not wrapped.

I buy bulk soap. It is often in a rack where you get to cut your own block from a large block. It’s part of the fun of buying it this way. When I encountered a particularly stubborn bagger who was extremely intent to wrap my soap in its own bag, I had to remind her that the soap was actually going to be used on my body. She still protested about it coming in contact with food I eat. Really?

I’m not saying it’s safe to eat soap (in fact, isn’t that a child-protective services violation these days). But, when it comes to waste, particularly plastic-bag waste, can’t we get over it and just put that brick of fine-smelling soap on top of the box of granola wrapped inside wax paper inside the cardboard box? I think so.

Oranges in Your Stocking & Oranges in Your Marmalade

Orange season was getting away from me. Florida and California varieties usually arrive around the second week of November and keep coming through late spring. They’re not great at the extreme ends of the season. February, March and April are the peak months. Late in the season they are likely to be dry, puffy and expensive. Oranges are not a summer fruit.


My grandparents and great-grandparents knew what it was like to go three seasons without an orange. And my hunch is that they knew very well the first November oranges weren’t the best and that’s why oranges stuffed in December’s Christmas stockings were considered a wonderful treat. By the time the tradition made it to my generation, my cousins and I didn’t understand it and we didn’t see the sense in using an apple and an orange to take up valuable chocolate space in the stocking.


Now knowing that oranges in the winter are the watermelon of summer, things seem very different. Imagine if we weren’t able to go to the grocery store any time of the year whenever we chose to buy oranges and fresh (real) orange juice. Oranges would definitely feel like an exciting gift in December.


With prices the lowest of the season, at the time when they are the best-tasting, it was time to buy in bulk even if they were perishable. The WWII answer to perishable bulk was to preserve.


Orange Marmalade. Not my favorite, but one of the only peanut butter combinations my husband will eat.


In the 1942 Woman’s Home Companion Cook Book, marmalade is described as “similar to jellies in texture with small thin slices or small pieces of the fruit appearing throughout the product. They are usually although not always made of citrus fruits.”


An orange marmalade takes 10 medium-sized oranges, 2 large lemons, water and sugar.


Here’s the recipe instructions: Wash the fruit thoroughly; cut in quarters, then in very thin slices, discarding all membrane and saving all pulp, rind and juice.


Cover with cold water in a heavy kettle; let stand overnight.


Cook in the same water until the peel is tender; let stand for 5 to 6 hours.


Weigh the whole batch and add an equal weight of sugar.


Cook until the sirup gives the jelly test. Stir frequently to prevent scorching.


Pour immediately into hot sterilized jars and seal at once.


The Jelly Test: As the juice-sugar mixture nears the jellying point test frequently. Dip a spoon into the boiling mass, remove and allow the juice to drip from the side of the spoon. As it nears the jelly stage it will drip from the spoon in two drops ¼ to ½ inch apart; when the jellying point has been reached the two drops will run together and drop off in one sheet or flake.


A candy or jelly thermometer may be used instead of the jelly test to determine the jelly stage. At sea level the jellying point is reached at 220° F to 222° F; at higher altitudes it is reached at a lower temperature.

IMG_20160221_123550890_HDR

The 1942 cookbook goes on to describe the next steps of filling and sealing the glasses: Skim the surface of the jelly and pour immediately into hot sterilized jelly glasses, holding the pot close to the glass while pouring to avoid incorporating air bubbles. Fill the glasses to within 1/8 inch of the top; the jelly shrinks as it cools.


Pour a thin layer of melted paraffin immediately over the surface of the jelly. Allow the jelly to cool thoroughly, then cover the glasses and store in a cool place.


I used the thermometer method. Actually, I tried both, but the jelly test method left too much room for error. It’s one of those things I feel need to be shown, not read about, to fully understand. The next easiest thing would be to YouTube the jelly test method and watch/listen to a stranger through my computer explain it – I think I’d much rather find someone who learned from their mother or grandmother to show me.


All told, for a very short amount of time and for roughly 23¢ a jar (uh-huh!), I will likely not buy marmalade from the store ever again.IMG_20160221_145029298_HDR

An Apple (or Bushel) A Day

August and September brought an abundance of apples. Off of our two little trees planted only two years ago, we harvested 21 pounds of Miniature Red Delicious and Wolf River varieties. I specially planted the Wolf River to honor my Great-Grandmother Mabel Crook who wrote in a family heritage narrative to describe the many types of apples growing in their apple orchard in Green Lake Wisconsin, “There were Snow, Talman Sweet, Jonathan, Wolf River, Greening and Macintosh.”

IMG_20150907_094713442

IMG_20150907_094739532

IMG_20150907_095414779

In addition to the apples we picked from our yard, a friend gave us all the windfall apples they could pick too. Needless to say, we had enough apples for lots of WWII style creative storage!


First up, washing everything. I used a sink full of water mixed with a cup or two of distilled vinegar to rinse the apples.

IMG_20150829_134017787

I started out with canned Apple Pie Filling.  It’s best to start by making the syrup. While it cooks you can core and peel the apples…lots and lots of apples.

IMG_20150907_112729098

IMG_20150907_110747624

When I had the jars stuffed full of the apples, I poured the syrup into the jars and then processed.

IMG_20150829_134035555

IMG_20150829_145006018

This recipe will need cornstarch added when I open the cans and use them. Cornstarch is not canning stable, according to the USDA.


Once I had finished a full kettle of Apple Pie Filling, I switched over to Applesauce. I added brown sugar to the apples and boiled them down. Next, I put them through my mill and added a little bit of leftover syrup.


IMG_20150829_153701005

Even after all of the canning, I still have leftover syrup. I’m saving it in my refrigerator to add to apple juice in small batches to make spiced apple cider.

IMG_20150829_161846525


Recipes:

Apple Pie Filling

  • 4 1/2 cups white sugar
  • 1 tablespoon ground cinnamon
  • 1/4 teaspoon ground nutmeg
  • 1 pinch ground cloves (optional)
  • 2 teaspoons salt
  • 5 cups water
  • 3 tablespoons lemon juice
  • 6 pounds apples, peeled and cored

In a large pan over medium heat, mix sugar, salt, cinnamon, cloves and nutmeg. Add 5 cups water and mix well. Cook and stir constantly until sugar is dissolved.

Stir frequently, boiling until mixture is thick and bubbly. Remove from heat and add the lemon juice.

Fill jars  halfway with sliced apples. Then pour liquid into jars to about one inch from the top of the jar. Ladle the syrup over the apples, then add more apple sure to leave at least 1/2 inch of room between the filling and the jar top to allow for a little expansion.

Slide a thin plastic, silicone or wooden knife around the sides of the jar to remove air bubbles, then put the lids and rings on the jars.

Add a few cups of cold water to your boiling water bath to equalize the water temperature to the temps of the filled jars and place jars in the boiling water, making sure there is enough water to cover the jars with at least a 1/2 inch of water.

Bring canning water to a rolling boil. Once the water is at boiling, let the jars sit for 25 minutes.


Applesauce

Put about six cups of cored and peeled apples into Dutch Oven. Add about a cup of water or apple juice. Add juice of one lemon. Add 1/2 cup of brown or white sugar and about 1 T of cinnamon (to taste). You can also add ground cloves, allspice, or ground nutmeg — whatever you like! Stir the pot well and then cover for about 25 minutes.

At this point, you may be done! Or, you may want to put your apples through a mill or blender…whatever you prefer. Decide if you’d like to eat it right away or in smaller batches throughout the next year by processing in a water bath.

You Say Tomato…I Say Sauce

Another week has gone by and the counter has filled up with more good things from the Victory Garden.  IMG_20150828_143714529

I planted two types of tomatoes in the spring — Better Boy and Cherry. Both types were planted from seed, something I haven’t tried before because it takes an incredible amount of patience to wait for tomatoes to come up while the ones in the store are about to turn red even before frost is over and all you have to do is plop them in the ground. But, the funny thing was the seeded tomatoes I planted were ready to pick the same week as the store-bought in other people’s gardens.

Now that the sun is baking the yard every day, I am picking about three Better Boys and a dozen Cherries every day.  Every. Day. That’s about 2 dozen large tomatoes by the end of one week and let’s just say roughly a million small ones in the same time.

So off I went to track down some good canning recipes. Salsa and Whole Tomatoes made the short list, but I settled on Spaghetti Sauce and Tomato Cocktail Juice.

For the Spaghetti Sauce, I used the Basil-Garlic Tomato Sauce recipe from the Ball Canning website. Key is to use lemon juice or citric acid in the recipe to keep it from spoiling during storage. I also learned I didn’t cook it down long enough. I simmered my recipe for an hour, but I should have gone 2-3 hours. As it cooled in the jars, it separated and became watery; still good, but not nice and thick like the really good stuff.

IMG_20150830_092107184

For the Tomato Cocktail Juice, I used a trusted recipe from Oscar, a dear family friend of my Aunt Carol. He shared his very best recipes and tips with Carol before passing away a few years ago.

Here’s Oscar’s recipe:

1 Kettle Cut-Up Tomatoes

2 Stalks Celery

1 Bay Leaf

2 Onions

1/2 Green Pepper

Parsley Flakes

2 T Salt

2 T Sugar

2 T Lemon Juice

Cook until tender, about one hour. Put through a strainer and reheat. Bring to a boil again for about 30 minutes. Put into jars and seal. Process in hot water bath for 30 minutes. Keep water hot, but not at a rapid boil.

Carol adds carrots as well.

The best part about this recipe is that it used up both types of tomatoes. I boiled both down really well and then ran through my Omega juicer (one luxury of convenience I wish my grandmothers could have had!!).  The juicer removed the seeds and skins completely, leaving juice and a fair amount of pulp.

While I’m being honest about my shortcut here, I’ll also confess that I did not cook down the onion, green pepper, celery or carrots. I juiced them after I ran the cooked tomatoes through. I’ve never tried juicing an onion or green pepper before, but it turned out fantastic and cut a lot of time off my finished recipe. I had been at the tomatoes for three hours by the time I got to the Tomato Cocktail Juice. So, if you wonder how I could stray off my WWII rules…yeah, don’t ask!

The end result is amazing. I am picky about tomato sauce. The only brand I buy is Hunt’s. The Tomato Cocktail Juice comes so close to the taste of Hunt’s Tomato Sauce that I’ll likely use it instead of Hunt’s and enjoy the added value of the other vegetables.

Drink Their Tomatoes

Waste Not.

Stop WasteAn overriding value of the WWII project is about avoiding waste. Whether the value was learned through the years of The Great Depression, or through government facilitation, it has always been clear to me that people alive during WWII were conscious about waste. Their efforts made them selfless in our minds and to them each following generation seems indulgent and living with a growing sense of entitlement.


About waste in general, I turned to a valuable timeline found on the Association of Science – Technology Centers site.


1927: John M. Hammes, an architect in Racine, Wisconsin invents the InSinkErator® food disposer in his basement. It is patented in 1935, a year when only 52 models sold.


Why is that important, you may ask. Well…think about it. 52 garbage disposals installed; do you know of any modern homes without a disposal these days?


There was a real problem at the company ten years later, as their salesforce was still trying to figure out how to sell disposers. They just weren’t necessary for the small amount of kitchen waste produced.


After WWII though, 18 competitors of InSinkErator arrived on the scene. Times were changing.


In the early 1900s, Americans were estimated to waste 80-100 pounds of food per year, per person. Can you believe we are now tossing 20 pounds per person, per month? That’s 100 pounds in 1900, 240 pounds in 2015.

What has made this change? Availability. Convenience.

Convenience came in the form of several inventions:

1914 – Wax Paper

1928 – Cellophane

1929 – Aluminum Foil

1930 – Plastic (polyvinyl chloride) and polystyrene

1937 – Nylon, the world’s first synthetic fiber

Waste Fat

Before such inventions, we were only able to take what we could eat. We weren’t able to store food easily so we better judged what we really needed. I can give an example. Today I reluctantly tossed out a half full clamshell of grape tomatoes to the compost that had gone beyond their safe ripeness. I don’t do this absent-mindedly. I think about what I did that led to such waste. I realized it’s about size and portions (the American way!). The clamshell held about a 1 ½ pounds of grape tomatoes — roughly 60 of them. Realistically, there’s no way we would have eaten that many grape tomatoes. We have learned to buy for size, without thinking if it’s really what we need…value is in the bigger package, right Sam’s Club and Costco?


Speaking of packaging, I’m having trouble with the local grocers. They have a real problem with me not allowing them to wrap household items in plastic before putting in my bags with my other items. Never mind the fact that most of what we buy is wrapped in heavy plastic, slid inside a cardboard box. In the case of most household items (shampoo, soap, moisturizer, cleaning supplies), that are put on our bodies or countertops where we serve food, what is the problem if it comes near my food on its way home from the store?

Waste Paper

Anyway…back to waste. In 1947, J. Gordon Lippincott, an Industrial Designer of the time, made a comment on an observation he had made: “Our willingness to part with something before it is completely worn out is a phenomenon noticeable in no other society in history. It is soundly based on our economy of abundance. It must be further nurtured even though it runs contrary to one of the oldest inbred laws of humanity – the law of thrift.”  That said in 1947, long, long before Apple phones are replaced every two years for the newer version with cooler features! Mr. Lippincott was actually referring to inventions such as disposable Bic pens and disposable Gillette razors. This type of waste just didn’t make sense.


Sadly, things only became worse as Americans became increasingly focused on consumerism.


1953: The American economy’s “ultimate purpose is to produce more consumer goods”. – Chairman of President Eisenhower’s Council of Economic Advisors.


“It is our job to make women unhappy with what they have.” – B. Earl Puckett, Allied Stores Corp.


1991: “Our economy is such that we cannot “afford” to take care of things: labor is expensive, time is expensive, money is expensive, but materials — the stuff of creation — are so cheap that we cannot afford to take care of them.” – Wendell Berry


1993: “We’re reminded a hundred times a day to buy things, but we’re not reminded to take care of them, repair them, reuse them, or give them away.” – Michael Jacobson, Center for the Study of Commercialism


By latest claims, Americans throw out 230,000,000 tons of trash (4.6 pounds per day) per person annually. Less than ¼ of that amount is recycled.


And back to food waste — it’s too much. 20 pounds per person, each month of food. Roughly 15% – 20% of what we buy we throw out.


Think about the additional waste of resources involved. According to author and food waste expert Jonathan Bloom, food waste is not just a moral issue, but also an environmental issue. “A tremendous amount of resources go into growing our food, processing, shipping, cooling and cooking it,” said Bloom. “Our food waste could represent as much as six percent of U.S. energy consumption.”


It comes down to winning the modern war against overabundance and consumerism.


Stores overstock. If the shelves or produce displays look empty we think there is something wrong with what’s left. No one wants to take the last head of broccoli.


Any produce slightly subpar is tossed before it even goes to market. The USDA standards of grading produce puts a farmer at loss. If something is a Grade 2, two-thirds of its market value is lost, even though taste and freshness is identical to a Grade 1. It’s all about aesthetics.


91% of consumers have tossed food for the reason it is past its ‘sell date’. There are no USDA health or safety standards on food expiration (except in the case of baby formula). The dates you see on food in a store is determined by manufacturer — someone who would have an interest in you tossing to buy again.


So, here we are in 2015…70 years since WWII and the food rules. ‘Living Green’ is popular…reduce, reuse, recycle feels like a hip concept to us. Don’t be fooled. The trend was a way of life, not a trend, until the end of WWII and we’re not even close to mastering it the way our grandparents did. This is one of those lessons we must hold on to.


Don’t buy more than you need. Use what you buy. Reuse or recycle what’s left of packaging, if you can’t avoid packaging completely. Or, as they use to say – Use it Up, Wear it Out, Make it Do, or Do Without!

Food Waste

The Six Month Mark of the Project

Today marks the halfway point for the WWII Food Rationing Project year. The starting day was the anniversary of Pearl Harbor, which was the event that sent the United States into the war and rationing.

So, how’s it going?

IMG_20150607_125024429_HDRIn the first month of the project, I was able to manage the weekly meal prep according to the Meal Planning booklets from 1943/1944.  It would take an entire day to prep the food, which is okay since I like that kind of mindful working. The recipes were good, though notably scaled back from what we were eating prior to the project. One problem though was keeping sandwich bread fresh and soft through the week, especially if I made lunches ahead of time for the week, wrapped in wax paper. By Friday, we felt like we were eating celery/egg sandwiches on toast. Preparing lunches for the day during the morning rush proved too complicated in my routine without losing an hour’s worth of sleep that made me functional for the day. I say it over and over – I don’t know how they did it!

I enjoyed making bread every week. But, I am currently trying to find a recipe for Potato Bread instead of the typical wheat flour recipes I had been using. I’ve been buying instead of making for two months’ time. IMG_20150607_125238013_HDR

I haven’t purchased sugar in over three months’ time. In the beginning of the project I wasworried about supply and running on fumes by the end of the week. That was also at the time I was following the meal planning booklets closely. We’re not eating desserts at the end of each meal. The worst craving was for Oreo cookies and with their invention in 1912, they actually were on the allowed list.

We have a huge (to our standards) “Victory” Garden. It’s a pain to keep up. During WWII people were encouraged to useIMG_20150607_130141634 every inch of lawn space for a Victory Garden. We’re only using about 1/8th of our yard for it and I can’t keep the weeds down.

Plastic containers have left our kitchen for good. It didn’t take long to switch over to glass. I’m still using freezer bags in the freezer since I IMG_20150607_125310473_HDRcouldn’t come up with a better solution. Utensils were a challenge to replace and I have scrounged around antique shops and estate sales to repurchase non-plastic measuring spoons, cups, and such. One recipe booklet told me to use a rubber spatula to scoop something out of a jar. I was elated! I would easily nominate rubber spatulas as the greatest kitchen invention of modern time. Something so simple, right?

IMG_20150607_125521396It is rare for food to be thrown out. My mother is a master of leftovers and it’s taking me practice to get there, but I’ve greatly improved on food waste. The solution is to not buy things special for a recipe that I’ll only use once and don’t buy anything I don’t need, period. There is always a suitable substitute for ingredients, or you can omit (Use It Up, Wear It Out, Make It Do or Do Without).

I haven’t purchased cleaning supplies in six months. Yes, I still clean the house! Vinegar, Borax, baking soda, lemon juice/oil all do the job. For everything. When a t-shirt is beyond its wearable lifespan, it is cut up into four rags. Which can be rewashed.

We are eating a lot of chicken. Chickens weren’t plentiful during WWII, they were needed for eggs, but when we started following the recipes we were eating way too much red meat, even under the monthly rationing standards. I categorize this change as “When You Know Better”. It just didn’t feel healthy to be eating that way.

So, what do we eat?

Eggs. Chicken. Peanut Butter Sandwiches. Salads. Fruits. Vegetables – lots of potatoes. Ham. And, nobody is going hungry.

When I bake and cook I listen to the radio or music from the era. This point IMG_20150607_130519694
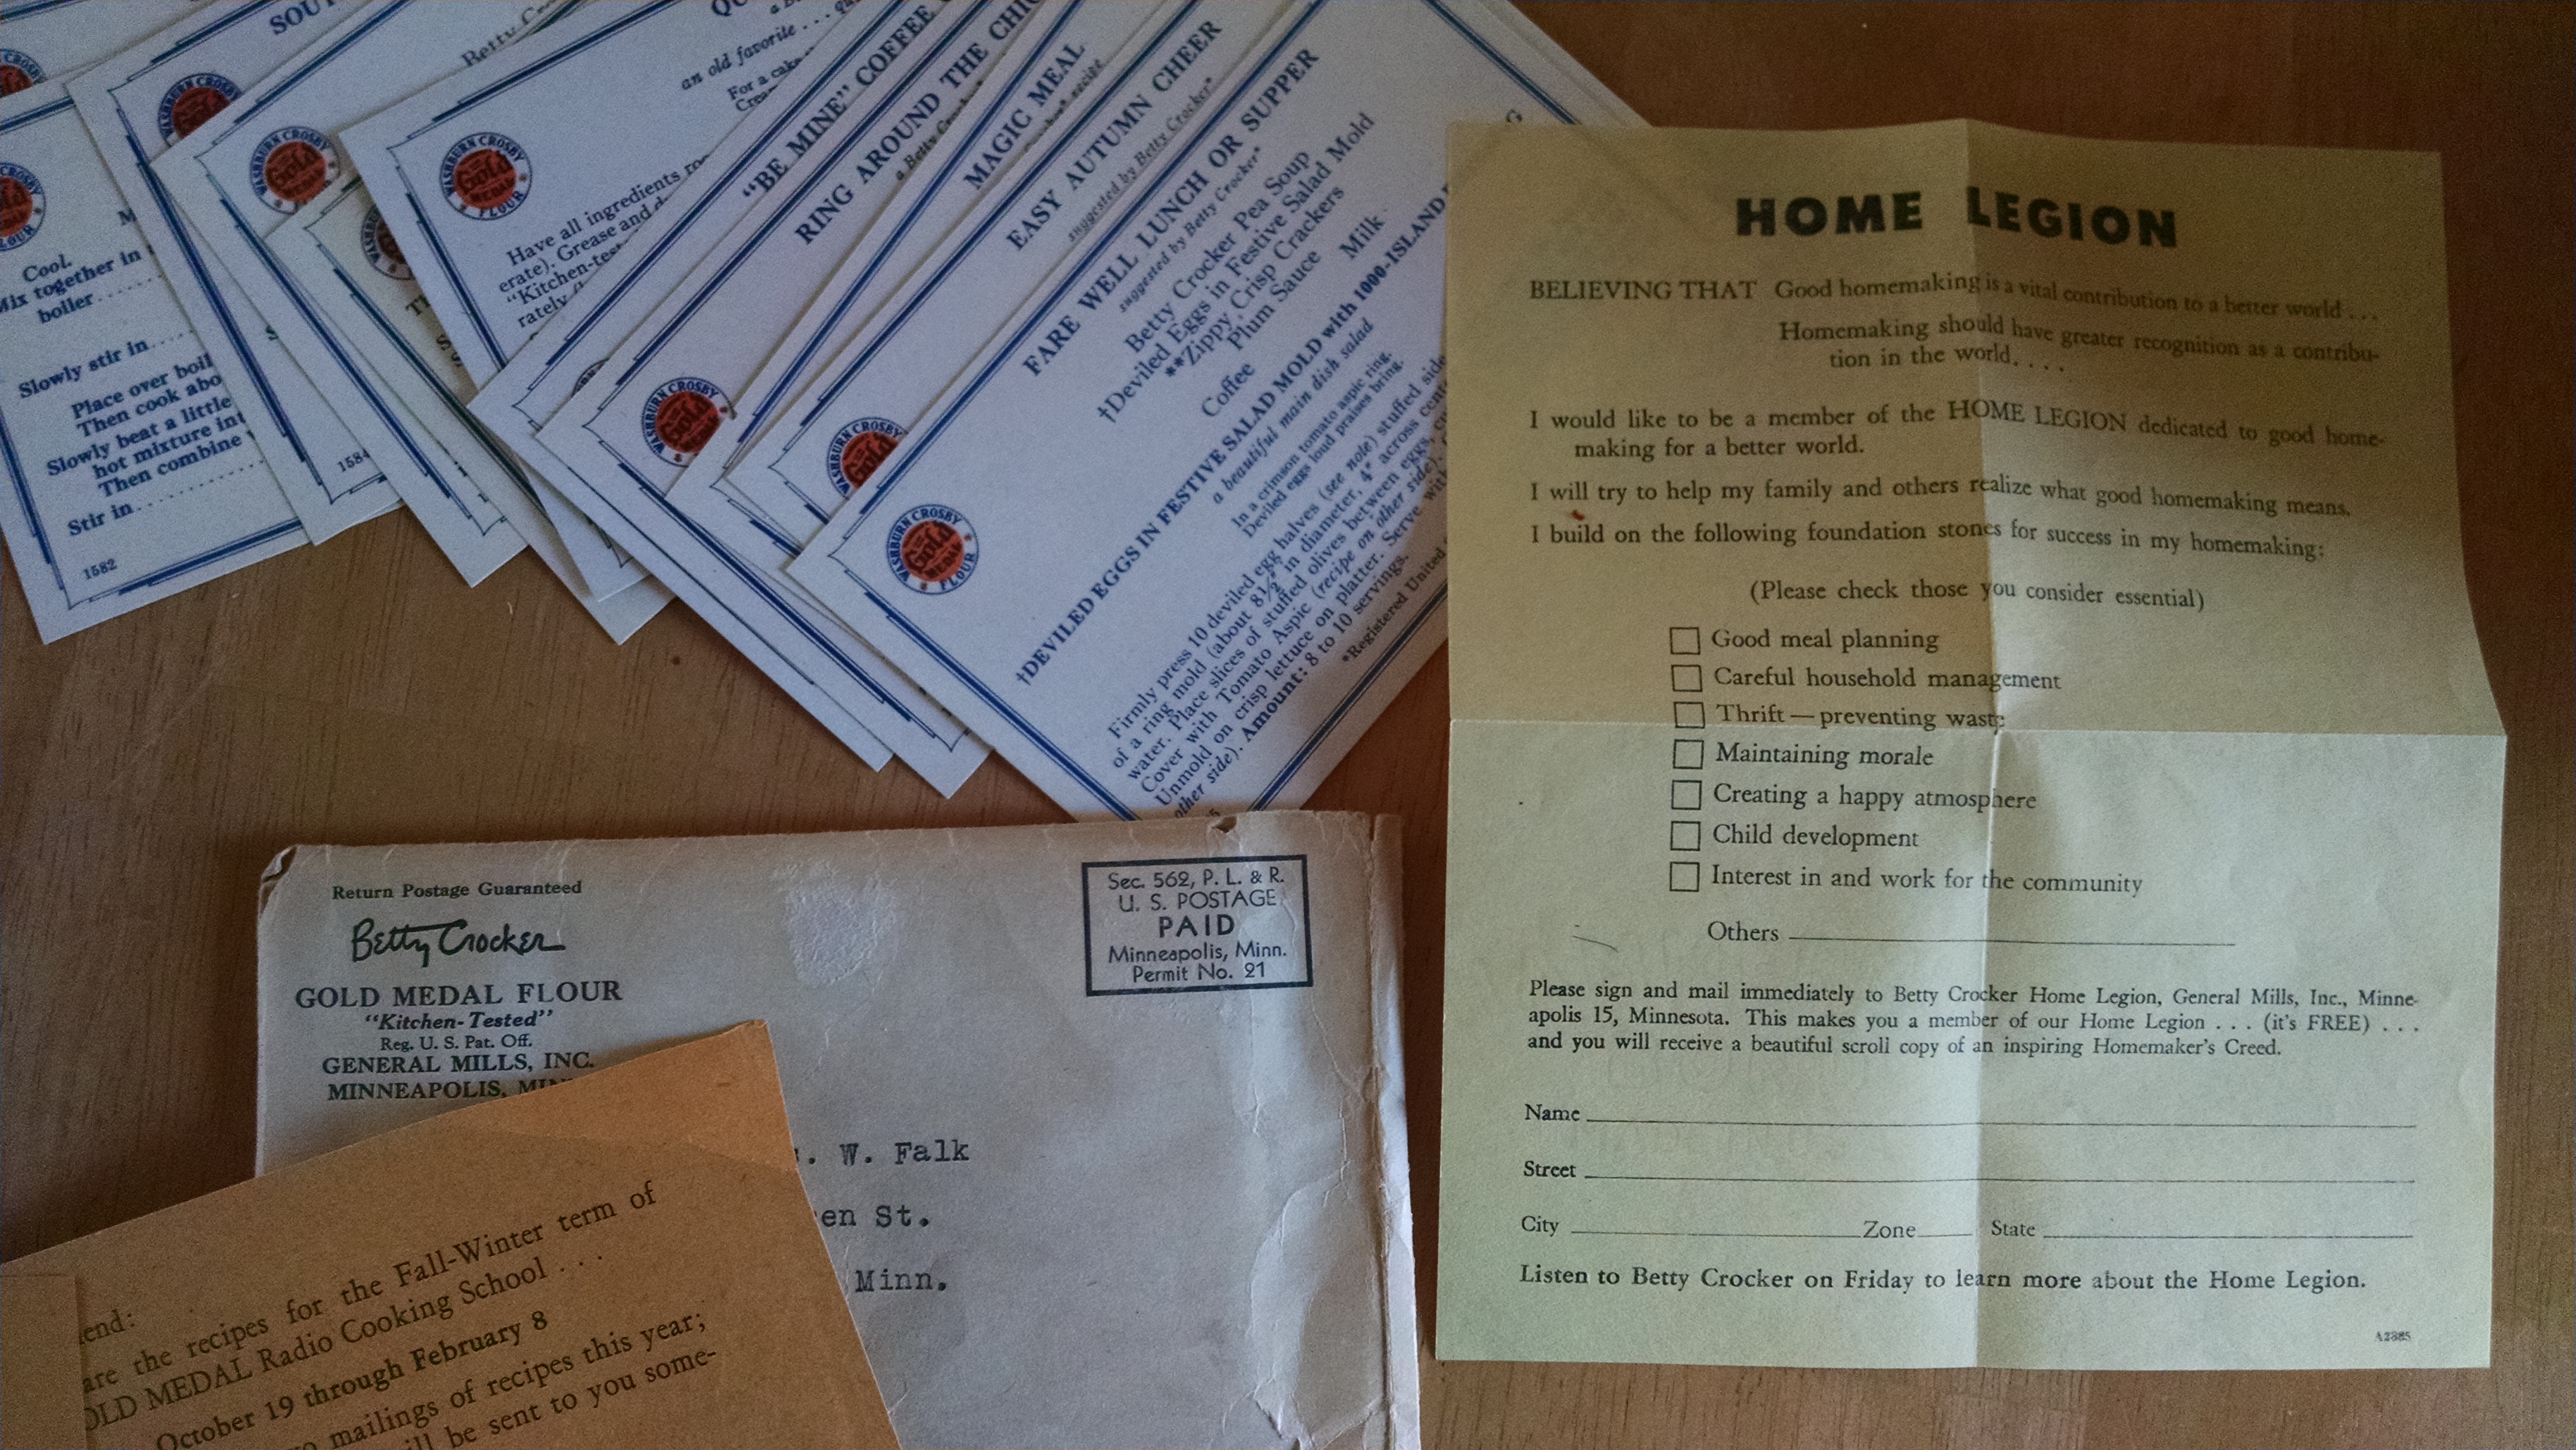
made me realize I had been forgetting that every single kitchen I spent time in as a kid had a radio centered in the kitchen.

Back in December when people asked me why I was going to start the project I told them it was a study in contentment, resourcefulness, and mindful eating. I have to say, it’s been all of that. In very good ways. The next six months will march on; starting today I will make a commitment to shore up some of the edges that have become frayed as far as the rules go and see what else comes along. To Victory!

« Older Entries