Archive for Dessert

Crisco – It’s Digestible!


It’s time to talk about Crisco. And the conversation starts with — What the heck is it?

Crisco was the first shortening to be made entirely of vegetable oil (cottonseed) in 1911 by Procter & Gamble. The original intent of the chemists behind Crisco was to find alternate uses for cottonseed oil as the demand of candles and soap, its primary output, was diminishing. Until that time alternatives included lard and butter.

Lard had taken a bad rap in 1906 when Upton Sinclair wrote a novel called The Jungle which told a quite memorable story about where lard comes from. (For a wonderful NPR telling of lard’s history, listen here: NPR’s Planet Money January 6, 2012 podcast

Butter was very time-consuming to churn, expensive to buy, and during WWII was hard to find or highly rationed.

The vegetarian answer to a demand ahead of its time was Crisco. It was not only revolutionary in its creation, but it was also revolutionary in its marketing. It was one of the original brand managed products with catchy radio ad jingles and radio show endorsements. It had a marketing slogan – “It’s digestible!”

But is it really? It’s made of 100% fat (with no water) so Crisco allows steam to form during the baking process, which leads to more tender baked goods overall.  It has a higher melting point, so pastry crusts stand taller and retain their shape. It can be easier to work with and has a longer shelf life than butter.

The modern Crisco is not the same as the original version – not even close.  What we learned in the 1990’s about trans fats and the bad news behind it, forced J.M. Smucker (today’s manufacturer) to re-engineer the process of making Crisco to eliminate almost all trans-fat in the product and to use soybean oil or a combination of cottonseed and soybean oil in its creation. And remember, it originated as an experiment in soap making!

Whether you decide to include Crisco today in your diet or not, it is hard to avoid in my WWII kitchen.

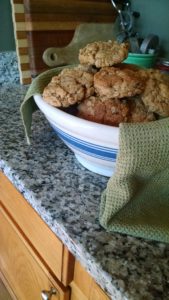
Aside from a full myriad of recipes from Crisco’s Famous White Layer Cake to Soybean Chop Suey in my Recipes for Good Eating cookbook, printed by The Procter & Gamble Company in 1945 for the exclusive marketing of Crisco, I also have quite a few leaflet recipes endorsed by Mary King, spokesperson for King Midas Flour.  This one for Peanut Butter Crisps was edible…and digestible.

Mary King’s Peanut Butter Crisps

Sift together… 1 ½ cups King Midas Enriched Flour

½ cup sugar

1 teaspoon baking powder

½ teaspoon soda

½ teaspoon salt

Blend in…            1/2 cup vegetable shortening, room temperature

½ cup chunk style peanut butter

½ cup brown sugar

1 teaspoon vanilla

2 eggs

1 cup quick rolled oats

Drop…                  by teaspoonfuls onto greased cookie sheet

Bake…                  at 375° F for 10 to 12 minutes. Makes about 4 dozen cookies.

NOTE…                 If desired, dough may be chilled and used as needed.
 

Break All Rules…Make Delicious Cakes

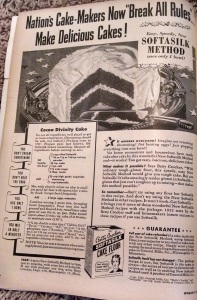
“Nation’s Cake-Makers Now “Break All Rules”…Make Delicious Cakes!” – Easy, Speedy, New Softasilk Method uses only one bowl!” Betty Crocker touted the new Softasilk Cake Flour as “Our Dream Come True”.

IMG_20160214_164432892_HDR

To those who may not remember a time when cakes were made by opening a box and adding a minimal number of ingredients, with the most time-consuming part of the ordeal being the time the cake sat in an oven, cake baking originally took much more time, a list of ingredients and more than one bowl. Who had time for such a chore?


In its first move towards more convenient baking, General Mills’ Softasilk invention was an “amazement”. There was no longer a need to cream shortening first in its own bowl and beat eggs inside their own bowl to make a good-tasting, fluffy cake.


The revolution involved understanding gluten (and you thought gluten was a modern foodie term!) and making it softer, less tough.


So, what is the secret? It’s a special kind of flour, cake flour. Basically, it comes down to how much protein is in the flour. This determines whether your dessert is light and cake-like, or thick and bread-like.

Hard wheat produces a high-protein flour usually sold as “bread flour”. Soft wheat produces a low-protein flour usually called “cake flour”. The stuff that’s usually sold as “All-Purpose” flour is a mix of the two. According to my research, Softasilk is all-purpose flour with a touch of cornstarch added, lightening the final product. You can make a fair version from the all-purpose you already have in the pantry by adding 1 tsp. cornstarch to every cup of all-purpose flour called for in the recipe.


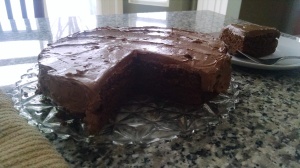
Back to the advertisement in the Woman’s Day 1943 magazine, homemakers could send for four ‘amazing’ recipes. The recipe included in the magazine was Cocoa Divinity Cake.


Cocoa Divinity Cake

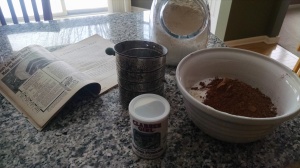
Set out all ingredients well ahead to get to room temperature. (Shortening should be soft, not melted.) Pre-heat oven to 350°. Prepare pans (see below). Sift Softasilk before measuring. Measure all ingredients before starting to mix.


Sift together into bowl:

2 C sifted Softasilk

*1 ¼ or 1 ½ or 1 ¾ tsp. baking powder

¾ tsp. soda

1 tsp. salt

1 ½ cups sugar

6 tbsp. cocoa

Add:

2/3 cup high grade vegetable shortening

1 cup buttermilk

Mix with electric mixer on slow to medium speed (or beat with spoon) for 2 min. by clock. Scrape bow frequently.

Add:

2 large eggs, unbeaten.


Mix with electric mixer 2 more min. (scraping bowl frequently). Pour into two well-greased and floured 8-in. round layer cake pans or one 8 ½-in. sq. cake 45 to 50 min.; in moderate oven (350°).

1 ¼ tsp. double action type (“Clabber Girl,” “Davis,” “Calumet,” “KC,” etc.); or 1 ½ tsp. phosphate type (“Rumford,” “Dr. Price’s,” etc.); or 1 ¾ tsp. tartrate type (“Royal” etc.). For an attractive red color, add ¼ tsp. red vegetable coloring to batter.


NOTE: You can rest a moment when mixing by hand. Just count actual mixing time.

IMG_20160214_140411809

IMG_20160214_163140216

Softasilk cake flour is still sold under the Pillsbury family of baking ingredients.

Thankful

wwii-rockwell-freedom-want-posterNorman Rockwell’s Freedom from Want painting is an iconic Thanksgiving scene of generations gathered around the dining table with a golden brown turkey as the focal point. The painting served an important purpose to keep Americans focused on the rewards of sacrifice that couldn’t be far off.

Thanksgiving meals during WWII had traditional elements similar to modern day dinners. The November 1943 Health For Victory Meal Planning Guide outlined a special meal for the day:

Roast Chicken with Gravy, Southern Corn Bread Dressing, Mashed Potatoes, Wartime Cranberry Sauce, Green Beans in Creamy Sauce, Enriched White Bread, Butter or Fortified Margarine, Eggless Pumpkin Pie, and Cream Cheese Topping.

Turkey has never appeared in any of the WWII magazines or cooking pamphlets I’ve collected. The way we think of a full bird turkey now – an occasional meal for special holidays – was how families viewed chicken back in the 1940’s. All of the folks I interviewed for this project mentioned that chicken was a special meal, served less than six times a year. And for the family that could not find a chicken for the table, they turned to the field for a goose, duck, pheasant…and possibly a wild turkey.

From the menu in the wartime planner, I focused in on two recipes: Wartime Cranberry Sauce and Eggless Pumpkin Pie.

Wartime Cranberry Sauce:

1 c. light corn syrup

1 c. sugar

1 3/4 c. water

4 c. cranberries

Boil corn syrup, sugar and water together 5 minutes. Wash cranberries and drain. Add cranberries to the syrup and boil – without stirring for 5 minutes. Remove from heat and allow to cool in the saucepan. Makes 1 quart of sauce.

Eggless Pumpkin Pie:

2 c. pumpkin

1 c. brown sugar

1 c. milk

2 tbsp. cornstarch

2 tbsp. all-purpose enriched flour

1 tsp. lemon extract

1 tsp. cinnamon

1 tsp. salt

1 tsp. pumpkin pie spice

Mix all ingredients together and pour into 9-inch pie shell. Bake at 450 degrees for 10 minutes, then reduce heat to 350 degrees and bake 30 minutes longer.

Cream Cheese Topping:

1 pkg. cream cheese (2 oz.)

1/4 c. sugar

1/2 tsp. vanilla

1/8 tsp. nutmeg

2 tbsp. top milk

Cream cheese, ether in an electric mixer or in a bowl with a fork. Add all ingredients and beat well. Very good on gingerbread, apple or pumpkin pie.

IMG_20151125_102713236[1]


An Apple (or Bushel) A Day

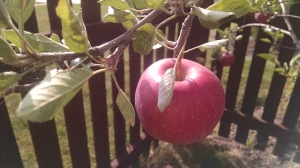
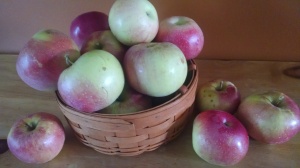
August and September brought an abundance of apples. Off of our two little trees planted only two years ago, we harvested 21 pounds of Miniature Red Delicious and Wolf River varieties. I specially planted the Wolf River to honor my Great-Grandmother Mabel Crook who wrote in a family heritage narrative to describe the many types of apples growing in their apple orchard in Green Lake Wisconsin, “There were Snow, Talman Sweet, Jonathan, Wolf River, Greening and Macintosh.”

IMG_20150907_094713442

IMG_20150907_094739532

IMG_20150907_095414779

In addition to the apples we picked from our yard, a friend gave us all the windfall apples they could pick too. Needless to say, we had enough apples for lots of WWII style creative storage!


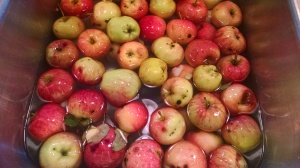
First up, washing everything. I used a sink full of water mixed with a cup or two of distilled vinegar to rinse the apples.

IMG_20150829_134017787

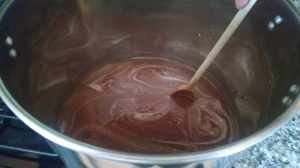
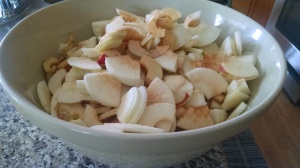
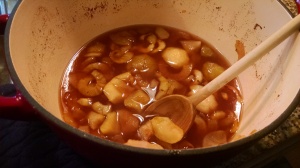
I started out with canned Apple Pie Filling.  It’s best to start by making the syrup. While it cooks you can core and peel the apples…lots and lots of apples.

IMG_20150907_112729098

IMG_20150907_110747624

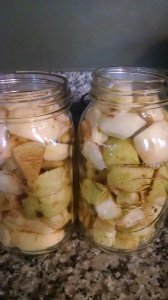
When I had the jars stuffed full of the apples, I poured the syrup into the jars and then processed.

IMG_20150829_134035555

IMG_20150829_145006018

This recipe will need cornstarch added when I open the cans and use them. Cornstarch is not canning stable, according to the USDA.


Once I had finished a full kettle of Apple Pie Filling, I switched over to Applesauce. I added brown sugar to the apples and boiled them down. Next, I put them through my mill and added a little bit of leftover syrup.


IMG_20150829_153701005

Even after all of the canning, I still have leftover syrup. I’m saving it in my refrigerator to add to apple juice in small batches to make spiced apple cider.

IMG_20150829_161846525


Recipes:

Apple Pie Filling

  • 4 1/2 cups white sugar
  • 1 tablespoon ground cinnamon
  • 1/4 teaspoon ground nutmeg
  • 1 pinch ground cloves (optional)
  • 2 teaspoons salt
  • 5 cups water
  • 3 tablespoons lemon juice
  • 6 pounds apples, peeled and cored

In a large pan over medium heat, mix sugar, salt, cinnamon, cloves and nutmeg. Add 5 cups water and mix well. Cook and stir constantly until sugar is dissolved.

Stir frequently, boiling until mixture is thick and bubbly. Remove from heat and add the lemon juice.

Fill jars  halfway with sliced apples. Then pour liquid into jars to about one inch from the top of the jar. Ladle the syrup over the apples, then add more apple sure to leave at least 1/2 inch of room between the filling and the jar top to allow for a little expansion.

Slide a thin plastic, silicone or wooden knife around the sides of the jar to remove air bubbles, then put the lids and rings on the jars.

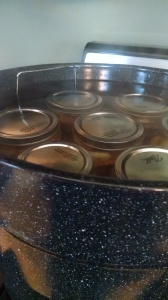
Add a few cups of cold water to your boiling water bath to equalize the water temperature to the temps of the filled jars and place jars in the boiling water, making sure there is enough water to cover the jars with at least a 1/2 inch of water.

Bring canning water to a rolling boil. Once the water is at boiling, let the jars sit for 25 minutes.


Applesauce

Put about six cups of cored and peeled apples into Dutch Oven. Add about a cup of water or apple juice. Add juice of one lemon. Add 1/2 cup of brown or white sugar and about 1 T of cinnamon (to taste). You can also add ground cloves, allspice, or ground nutmeg — whatever you like! Stir the pot well and then cover for about 25 minutes.

At this point, you may be done! Or, you may want to put your apples through a mill or blender…whatever you prefer. Decide if you’d like to eat it right away or in smaller batches throughout the next year by processing in a water bath.

Cornstarch Pudding with Raspberries

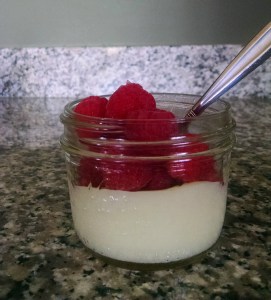
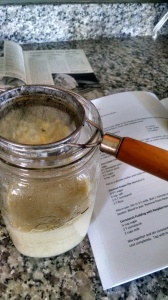
I mentioned in Grandma Crook’s birthday post that another recipe that makes me think of her is Cornstarch Pudding with Raspberries. It’s sweet and simple. IMG_20150426_121948045


Grandma’s farm had several raspberry bushes in addition to a big patch of strawberries, cherry trees and apple trees. Once the berry/fruit season started in the early summer, it didn’t end until fall. Getting out to pick early before the sun became too hot was just something that had to happen every morning. And once the picking was done for the day choices about baking, jamming, canning and freezing came next.

In the same time it would take to make jam, but with far less sugar, this recipe is great for a creamy smooth dessert.

Grandma Crook’s Cornstarch Pudding

1/2 C sugar

2T cornstarch

2 C milk

1 egg, slightly beaten

1 tsp. vanillaIMG_20150426_102330866_HDR

In a stove top pan, dissolve the cornstarch in the milk. Add the remaining ingredients and turn on the burner to medium. Stir constantly until the mixture becomes thick and starts to boil. Pour pudding through a mesh sieve to remove any cooked egg whites (ick…no one likes to eat that in their pudding!).Pour into individual size bowls/jars. Put in refrigerator to chill. Before serving, add fresh raspberries (whole or mashed) to the top.

Mabel’s Birthday Pie


Mabel on Rabbit

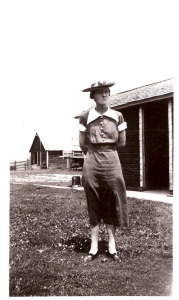
On this day in 1909, my Great Grandmother Mabel Buelow Crook was born. Everyone called her Grandma Crook. During WWII she was in her mid-thirties and living on a farm in Green Lake, Wisconsin.

Grandma and Grandpa Crook were probably part of the population least affected on the home front because they were farmers and doing an amazing job of living off the land before the war began.

Part of Grandma Crook’s legacy to my and future generations is that she loved to write. She kept a daily journal for years and took careful care to make sure the diaries were preserved in order for her voice and personality to stay with all of us.

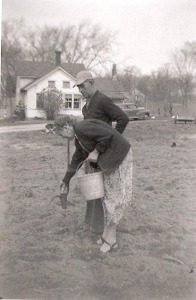
On several occasions she wrote about her memories in story format, going back all the way to what she remembered about her grandparents. She chronicled every season of harvest from their gardens, orchards, barn, fields and from the lake itself. Grandpa and Grandma Crook Planting Potatoes

She lived a life in perfect harmony with the seasons on the farm. An entire life history is easy to gather just from the food she prepared. When I remember Grandma Crook I think of her cornstarch pudding with fresh raspberries, strawberry glaze pie, dill pickles, baked beans, steamed cherry pudding, Thanksgiving dressing, and lemon meringue pie.

For Grandma Crook’s birthday party this evening I made lemon meringue pie (my all-time favorite as well). Some people view pie making as a chore, especially true for all the steps of lemon meringue pie, but I’m thankful I was taught at an early age how to make pie from scratch and enjoy the concentration of pie making.

Lemon Meringue Pie is edible patience and proof that good things come with taking the long way. Now that I look back through the list of Grandma Crook foods, it’s slow food and fresh-from-the-garden tastes that bring back memories of her.

So, to Grandma Crook I say, “Thank you for writing it all down and passing it down, Grandma. You’re never far away from us, especially at the table.” IMG_20150405_210119642[1]

Lemon Meringue Pie Recipe from Betty Crocker’s Picture Cookbook:

Crust: Mix 1 cup sifted Gold Medal flour with 1/2 tsp. salt and lard (or 1/3 cup plus 1 T hydrogenated shortening such as Spry, Crisco, Swift’ning, Snowdrift). Mix with fork until the mixtures forms crumbles. Sprinkle with 2 T water. Mix until the crumbles are moistened, but not much more. (My mother always told me the more you play with pie dough, the less tasty it becomes.) Once moistened, form into a ball and roll out with a rolling pin. Place into a pie plate and prick the bottom of the dough with a fork to prevent it from puffing up while baking. Put in a 475 degree oven for 8-10 minutes. Then, let cool.

Lemon Filling: Mix in saucepan 1 1/2 cups sugar, 1/3 cup cornstarch and 1 1/2 cups water. Dissolve all and then turn on the burner to medium. Stir constantly until the mixture thickens and boils. Boil one minute  and then stir the mixture into a separate bowl with three egg yolks. Mix well and then pour mixture back into the saucepan to boil for another minute.

Off the burner, blend in 3 T butter, 1/4 cup lemon juice, and 1 T grated lemon rind. Pour into the baked and cooled pie shell.

Meringue: Blend 3 egg whites with 1/4 tsp. cream of tartar until frothy. Mix in 6 T sugar and 1/2 tsp. flavoring (I use Penzey’s Lemon Extract).  With an electric mixer (how did Grandma do this without?!?!?!), beat the mixture until stiff peaks form. Pile meringue onto the hot lemon filling in the pie shell. Be sure to run the meringue to the edges of the crust to “seal” them, otherwise your meringue will shrink away from the crust as it bakes and you don’t want that to happen. Have fun with the meringue and swirl up some peaks and points on the pie. Bake at 400 degrees for 8-10 minutes.  Watch it close – meringue can go from delicately brown to burnt in seconds!

Let it cool for at least three hours. If you’d like to “weep” the meringue (honey-colored droplets on the meringue), put it in a draft while it cools.

Happy Birthday, Auntie! Sunshine Cake for Everyone!

1917 Adelina

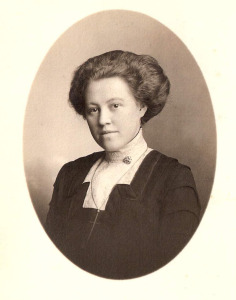
Adelina “Auntie” was born on March 31, 1894. Over the generations we lost track of whose true aunt she was. In 1943 she would have been 49 years old. Her sister was my Great Grandmother, whose son was my grandfather and soldier in the Army.

Auntie’s brother had served in WWI and letters between my grandfather and him show that he felt connected through war experience to Percy. Auntie served as the family member he could write to and share things that would have been too upsetting for his parents or his fiance, my grandmother.

Auntie was always cheerful. She did not have any children of her own, so she often relied on my grandfather’s family of 11 for entertainment and get-togethers. She was devoted to all of us – all four generations over the years – as if she were a mother.

She grew beautiful gardens of flowers. Peonies were her favorite. She stayed old-fashioned in many lovely ways. Her home was decorated in Victorian-era styles with bold wallpapers photo 1and crushed velvet chairs and couches. She had candy dishes full of Pepto-Bismol pink chalky mints.

I have trouble wrapping my mind all the food innovations she witnessed in her lifetime. She did not incorporate indoor plumbing until the late 60’s. Her kitchen sink involved an old hand pump. In the same year she was born, Iceberg Lettuce was introduced. She was older than Hershey’s Milk Chocolate, canned tuna and date palms. She loved dessert recipes and held on to hundreds of cake, frosting, pie, and all other sorts of treasures.  Maybe because it was an exciting introduction as a young child, she had every kind of date recipe one can imagine.

She was 18 when the Titanic sank and 34 years old when pre-sliced bread was introduced and 49 when it was banned during WWII as the machinery used to slice it in factories

1941 Adelinewas more needed for war production efforts.

I don’t know for sure, but I imagine she was a homemaker who, like many others, viewed the “progress” and “modern conveniences” of the kitchen post WWII as trouble. The new way was one that would lessen the authenticity of  homemade.

Auntie’s all-time favorite recipes were fudge and Sunshine Cake. The fudge she made in large batches and stored in coffee tins on the stairway. She’d offer the fudge to everyone who stopped by. Sometimes the fudge didn’t keep so well and when she popped off the cover the whole batch would be fuzzy and green.

The Sunshine Cake became a staple at the family birthday parties. There is family debate about the right recipe and ingredients. She was good about writing it down and sharing it with everyone, but some versions leave out the directions. Other versions are slightly different than all the rest. Luckily, the Sunshine Cake recipe was popular in its time and by patching together versions in the family and researching others online, it is possible to replicate Auntie’s favorite cake.

For Auntie’s party tonight I made the filling from a lemon/orange custard and the frosting from a boiled sugar water (7 Minute Frosting) combination. Auntie loved a caramel filling and topping, but I think she would have approved of my revision.

She probably would have asked to take the recipe home!

IMG_20150330_181404770[1]

Use It Up.

“Use it Up. Wear it out. Make it do, or do without.” — Mantra of the WWII generation. 

There will be many posts about this topic of wasting nothing. Everything about the home front during WWII involved making sure everything received its full use.

In my kitchen I’m having trouble parting with some things that I have no idea how I’m going to use — twist ties from fruit bags, fruit bags, empty jars (non-canning), frying pan grease (stay tuned for that post soon!). Every piece of paper, foil, cardboard is getting used twice and then composted or recycled.

With all this being said, it’s no surprise that every scrap of food must be used up. The EPA reported in 2012 that the US throws out 35 million tons of food each year. Estimates during WWII are around 4 million tons. How sad!

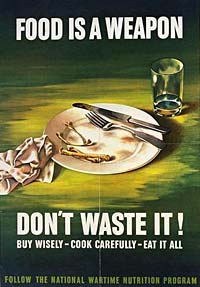
Of course, people living on the home front during the war were constantly reminded to not waste food. It was a matter of being a good patriot.

While the sentiment about being Food is a weaponmindful of those without enough to eat is still around, a big factor in food waste comes down to convenience – there’s no need to worry about using a ham bone to make broth since you can buy a can of it from any grocery store for very little money. Does anyone now have any idea how to take the giblet bag of a turkey/chicken and make it into a pan of gravy? Again, no…a can or a powder and some water will do the trick.

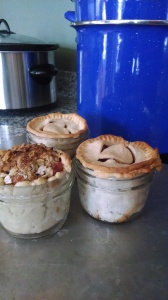
So, back to my kitchen. You know when you make a pie and there always seems to be more crust than pie plate? What can you do with the scraps?

The problem left me with an idea to make individual pies for lunches. There are a variety of ways to accomplish this. You can make “hand pies” by simply folding the filling into the crust and baking or frying (kind of like those Hostess Fruit Pies — warning…do NOT look at the calorie intake on those packages — well, actually – go ahead. Take a look at how many calories you are eating in those things! Spoiler Alert: I’m going to tell you now. 480 Calories per pie! 480!!)

I much preferred the idea of making a mini pie that could be contained in a lunch box. I simply pressed the leftover dough into a small mason jar, filled it with blueberries or apples and put them in the oven until they looked and smelled done.

IMG_20140504_115409932

Mission Accomplished: No Waste Today!

Cheery Cherry Cheesecake

Cheery Cherry Cheesecake

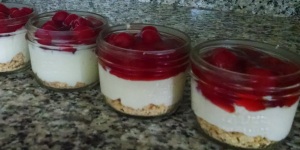
One of my all-time most favorite desserts is this incredibly simple, no bake Cheesecake recipe. Instead of pouring the cheesecake into a pie plate, I crumble some graham crackers into small Mason jars and then pour the cheesecake on top. The smaller serving size is perfect for lunch boxes and guilt-free portions after dinner.

Here’s the recipe:

1 package Cream Cheese, softened

1 can Sweetened Condensed Milk

1/3 C Lemon Juice

1 tsp. Vanilla

Mix all together. Pour over a graham cracker crust (I don’t even use butter or sugar anymore…just plain graham cracker crumbs). Chill for a few hours and thoroughly enjoy. When I have fruit filling or topping I add it. Other times I eat it just as is, without anything else.

This time around making the recipe, under the WWII rationing rules, I had run out of points to buy the can of Sweetened Condensed Milk. I was lucky enough to find a recipe to make some from scratch.  What?!?  Yes, making Sweetened Condensed Milk from scratch.

Here’s how I did it:

3/4 C Powdered Milk

3/4 C Sugar

1/2 C Hot Water

Combine the powdered milk and sugar together. Pour into the hot water and whisk.

I even prefer this homemade version to the can. It wasn’t quite as sweet and I could even back the amount of sugar down a little more if I wanted to (or needed to on a short sugar week).

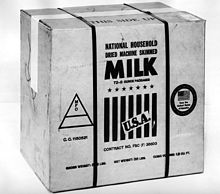
From a historical context, Powdered Milk became a very important food product during WWII. Our military and allies relied on its use, as it was easier to carry and store. The US was able to export the product quickly and easily to civilians overseas who were suffering through extreme food shortages and rationing. Powdered milk has similar nutritional value as normal milk, as it is one and the same – only a dried version.


220px-20111110-OC-AMW-0038_-_Flickr_-_USDAgov

US export Dry Milk, June 1944