Archive for Cleaning

Earning the Home Legion Distinguished Service in Homemaking Medal – Part II

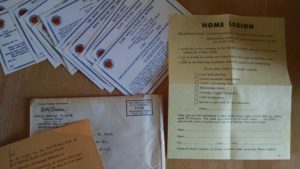
In earlier posts (here and here) we learned about the prestigious Home Legion medal for distinguished service in homemaking. I was incredibly fortunate to come into possession of a medal, but I don’t feel that I have ‘earned’ the pin until I have completed the steps that all original Home Legion members had to complete for the recognition.

Step one: Join the Home Legion by filling out the application. I shall check the boxes of ‘good meal planning, careful household management, thrift — preventing waste, maintaining morale, creating a happy atmosphere, and interest in and work for the community’.  Check!

Step two: Hang the Homemaker’s Creed on a wall in my kitchen. Check!

Step three: Answer the questions in the second round of mailings: “What do you do to insure a smooth-running home?”, “What little tricks do you use for saving time and labor?” and “How do you practice thrift in conserving food, household supplies, and equipment?”

What do you do to insure a smooth-running home? Short answer — simplicity and routines! Have you ever come across those cute flour sack towels with the day of the week embroidered on them?  Monday is Wash Day. Tuesday is Iron Day.  Wednesday is Bake Day. Thursday is Brew Day. Friday is Churn Day. Saturday is Mend Day. Sunday is Meeting Day. It goes back to the Mayflower and times when we needed to brew and churn.  Luckily, I don’t have to go that far back!  In McCall’s patterns of those towels, Thursday became Market Day and Friday became Clean Day. Other versions argue that Bake Day or Market Day should be Saturday.  Who knows for sure?

Anyway, there is an inborn tradition in me that makes Monday Wash Day. I grew up on a farm with rows and rows of laundry hanging on a clothesline — first load hung by 5:00 am on Monday morning! I do set aside time on Fridays for cleaning to make sure we start the weekend feeling tidy and organized. I like to make Market Day a Friday night event and grab dinner on the way home. That way Saturdays can be left for whatever we feel like doing and meal prepping can be done on Sundays for the week ahead.

Cleaning doesn’t seem so big of a chore when things are done as they need to be throughout the week too — dishes put in the dishwasher after meals are over. Bathroom sinks can be wiped clean after use as part of the morning routine. Before going to bed, the living room can be picked up if books, magazines, or other things were used through the day.

Little things like this only leave vacuuming, dusting, and other light cleaning tasks for Fridays.

Larger tasks and spring deep cleaning find their way to a list and scheduled like projects to be done when there is plenty of time to plan for and work on them.

What little tricks do you use for saving time and labor? We have lots of little tricks around our home for saving time and labor. The best have been locating general cleaning supplies used on each floor of our home (basement included) on each floor to save steps and make the routine flow. I am obsessed with planning efficiency and always study every task for any way of removing steps.  For example, when grocery shopping, I load my cart and then the conveyor belt with like items based on where they are located in my kitchen. They are bagged together in the same way and then when it’s time to put everything away, I can take my bag to the one area in the pantry or refrigerator or freezer where it all goes.

On meal prepping day, I locate all the ingredients for a recipe together in the pan or bowl I’ll be using to cook or bake it in along with the recipe card so all I have to do is pull out the bowl from the pantry, pull out any ingredients that were stored in the refrigerator or freezer, and take it all to the counter to assemble. All this planning goes a long way in reducing clean up time too.

How do you practice thrift in conserving food, household supplies, and equipment? Thrift always comes down to living the WWII mantra “Use it up, wear it out, make it do, or do without”.

We plant a garden. And in our home, food is prepped and frozen before it can go bad. If plans don’t go as first arranged, fruits and vegetables can be juiced very easily and efficiently. Berries not frozen also go into a smoothie or prepped into desserts.

Everything has a life cycle with several stages. Worn out t-shirts become dust rags. Tea towels act as cloth napkins — no paper towels or paper napkins in this house! We use cloth bags for shopping. Any plastic bags that accidentally find their way into the house are used as kitchen waste bags — we do not buy Hefty or any other kind of trash bags.  It really doesn’t make sense to pay for something that’s main purpose is to throw away! Same for paper bags – these are used for holding recyclable waste until they are tossed in the recycle bin (Waste Management does not allow plastic bags of any kind to be used in recycle bins).

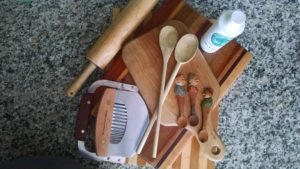
Equipment in the house is carefully maintained. Wooden cutting boards and utensils are waxed twice a year to keep in good condition. Garden tools are cleaned and oiled at the end of each season. Kitchen tools are cleaned and dried right after a thorough washing to avoid rusting. We use a clothesline for drying clothes in warm seasons to extend the life of the dryer. We use (and reuse) glass jars and containers — no plastic! Knives are carefully used, stored, and sharpened when needed, instead of buying new.
January in My Kitchen: It’s All About Maintenance

The U.S. involvement in WWII passed four Januaries.  The first, in 1942 was just short a month from the Pearl Harbor attack and a few months before rationing began. The final January, in 1945, occurred while the Battle of the Bulge waged in Europe, nearing the end without the home front knowing it would thankfully be the last January of the war.

In my kitchen, each January marks the memory of my grandmother’s birthday on January 14th, aged 13-16 during the war. 

January also seems like a good time to maintain the things that need to keep in good working order to use up, wear out, and make do throughout the coming year. Here’s a partial list:

  • Gardening Tools: A spray of WD-40* on the tools I will rely on in a few long, cold months in the Victory Garden helps to protect them from rusting and splintering. It also helps in keeping parts moving smoothly and efficiently when spring arrives.


  • Cords, Cords Everywhere: There is a law in my house that prohibits anyone from throwing away any twist-tie from a bread wrapper or other form of packaging. And here’s why. I take a walk through my house, room by room, cupboard by cupboard looking for any electrical cord that needs to be neatly held with a twist-tie. Or, if in use and not able to be wrapped up, at least has a twist-tie attached to it for future use. You’ll be amazed at how well this little task saves on bent plugs, messy cupboards and rooms, and tangled messes. Any cord that does not have a home gets wrapped neatly, labeled to remind me what it once belonged to, and then stored all together in one spot for electronic cords.


  • House Maintenance: At the same time while I am going room to room looking for cords to wrap up, I also take a notebook and pen with me to make note of anything in each room that will need extra attention throughout the year — such as painting, deep cleaning, repair, or something added/removed to make it more appealing. Obviously, I’m a list maker and I appreciate seeing things getting crossed off, but this is also a way for me to budget time and money for home improvements no matter how big or small.


  • Wood: It is crucially important to maintain any wooden cutting boards and wooden handles of kitchen tools. I maintain at least twice a year, but for sure in January when the humidity in the house may be at its lowest. I use mineral oil or butcher block wax to condition all of the tools, then I give my cupboards a quick swipe with the oily rag to make the most of the used oil.


  • Recipes: As my WWII kitchen project progressed, I began to realize that I can become overwhelmed with too many recipes in front of me. I have one cabinet in my kitchen where I keep all of the recipes and monthly menu plans that work best for our home. As months go by I may add a picture of a recipe snapped from a book or magazine that once looked interesting. So each January, I lay out all the cookbooks, binders, and loose pieces that have accumulated and archive the ones never used. I think of recipes in the same way I think of items in my clothes closet. I tend to wear the same things over and over and by purging what I don’t wear I save time by not giving myself too many useless choices. When it comes to meals and the groceries that go with them, it’s easy to make choices quickly since any recipe at hand is a good one and likely to be one that I am able to keep ingredients on hand. What’s for supper? I simply open the binder to any page and make what I see.


For now, this list will make the most of my January and set me up for another year of war in my kitchen!


*Okay, okay… WD-40 was not invented until after WWII in 1953, but using plain oil as was common in households during WWII is frowned upon in my home for the same reasons that WD-40 is so widely popular.

Kitchen Work Efficiency

Americans on the home front wanted to know what they could do at home to do their part in winning the war. The mantra, “Waste Nothing” was always the short answer. Waste nothing meant efficiency of every possible resource and thing, including time and human energy.


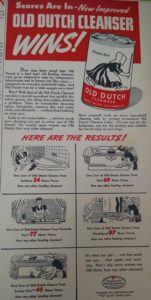
Efficient home making was the goal in homes across America during WWII. In a Woman’s Day magazine ad during winter of 1943, extensive testing is described that proves the Old Dutch Cleanser with Seisomtite is more economical and efficient than any other brand.

Advertisement for Old Dutch Cleanser published in 1943.

Advertisement for Old Dutch Cleanser published in 1943.

It ‘cleans your bathtub 34 more times than any other leading cleanser’, ‘your sink 69 more times’, ‘your favorite pan (which they describe as a 2-quart aluminum pan) 77 more times’, ‘your washbowl 97 more times’, and ‘your broiler pan 48 more times’.


The ad goes on to say ‘you should get one can for the bathroom, one for the kitchen and another for the laundry to save steps.’  This is not a bad idea! I have located a cleaning supply kit on each floor on my home — the upstairs, main level, and basement level. Having all that I need without pulling it out and lugging things up or down stairs is actually a huge time-saver and nearly half the battle when it comes to just starting the project of cleaning an area.


WWII had everyone thinking about highest possible efficiency. By the time the war ended and between 1946 and 1949, the University of Illinois School of Architecture Small Homes Council-Building Research studies introduced the world to their “work triangle” design study. The work triangle continues to serve as a standard of good kitchen design. The sink, stove, and refrigerator serve as the cornerstones of the triangle that make it possible to reduce wasted steps in time-motion studies originated for industrial applications in the late 1800’s studied by Frederick Winslow Taylor.


The kitchen work triangle principle:

  • No leg of the triangle should be less than 4 feet or more than 9 feet.
  • The sum of all three sides of the triangle should be between 13 feet and 26 feet.
  • Cabinets or other obstacles should not intersect any leg of the triangle by more than 12 inches.
  • If possible, there should be no major traffic flow through the triangle.
  • A full-height obstacle, such as a tall cabinet, should not come between any two points of the triangle.


Besides the work triangle itself, there are several rules of thumb to consider when planning a kitchen:

  • As measured between counter tops and cabinets or appliances, work aisles should be no less than 42 inches for one cook, or 48 inches for multiple cooks.
  • A sink should have a clear counter area of at least 24 inches on one side, and at least 18 inches on the other side.
  • A refrigerator should have a clear counter area of at least 15 inches on the handle side; or the same on either side of a side-by-side refrigerator; or the same area on a counter no more than 48 inches across from the refrigerator.
  • A stove or cook top should have a clear 15 inches area on one side, and at least 12 inches on the other side.
  • At least 36 inches of food preparation area should be located next to the sink.
  • In a seating area where no traffic passes behind the diner, allow 32 inches from the wall to the edge of the table or counter; if traffic passes behind the diner, allow 44 inches.
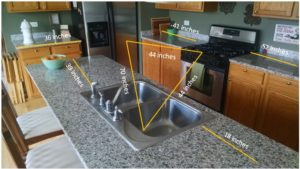
My kitchen.

My kitchen.

So, how efficiently designed is my kitchen?

  • No leg of the triangle should be less than 4 feet or more than 9 feet: I have two triangle legs that measure 44”, falling short by 4” to be efficiently designed.
  • The sum of all three sides of the triangle should be between 13 feet and 26 feet: My sum of legs is 158”, a mere two inches above the appropriate distance.
  • Cabinets or other obstacles should not intersect any leg of the triangle by more than 12 inches: No problems here.
  • If possible, there should be no major traffic flow through the triangle: No problems here.
  • A full-height obstacle, such as a tall cabinet, should not come between any two points of the triangle: No problems here.
  • As measured between counter tops and cabinets or appliances, work aisles should be no less than 42 inches for one cook, or 48 inches for multiple cooks: My aisles are 44”.
  • A sink should have a clear counter area of at least 24 inches on one side, and at least 18 inches on the other side: My sink has 18” exactly and 40” of counter space.
  • A refrigerator should have a clear counter area of at least 15 inches on the handle side; or the same on either side of a side-by-side refrigerator; or the same area on a counter no more than 48 inches across from the refrigerator: My counter on the handle side is 41”. My other counter, outside of the triangle is 36”. Being outside of the triangle, it hardly ever gets used! Now I know why.
  • A stove or cook top should have a clear 15 inches area on one side, and at least 12 inches on the other side: My counter tops on each side of the stove are 44” and 52”.
  • At least 36 inches of food preparation area should be located next to the sink: I have 39” of food prep area on the right side of the sink. Space inside the triangle is used often. The area outside of the triangle is not used very much at all and clutter accumulates there. 
  • In a seating area where no traffic passes behind the diner, allow 32 inches from the wall to the edge of the table or counter; if traffic passes behind the diner, allow 44 inches: Two counter top chairs are well within the 44” rule. When we moved into our home, there was an area set aside for a table between the counter and patio door area. It had a low-hanging lamp above the table area and was in the path of the pantry closet and patio door. No wonder it had to go! It felt extremely jarring to sit there. It’s math!! The math explains it all!
My kitchen's work triangle.

My kitchen’s work triangle.

The Six Month Mark of the Project

Today marks the halfway point for the WWII Food Rationing Project year. The starting day was the anniversary of Pearl Harbor, which was the event that sent the United States into the war and rationing.

So, how’s it going?

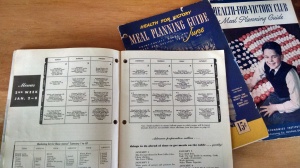
IMG_20150607_125024429_HDRIn the first month of the project, I was able to manage the weekly meal prep according to the Meal Planning booklets from 1943/1944.  It would take an entire day to prep the food, which is okay since I like that kind of mindful working. The recipes were good, though notably scaled back from what we were eating prior to the project. One problem though was keeping sandwich bread fresh and soft through the week, especially if I made lunches ahead of time for the week, wrapped in wax paper. By Friday, we felt like we were eating celery/egg sandwiches on toast. Preparing lunches for the day during the morning rush proved too complicated in my routine without losing an hour’s worth of sleep that made me functional for the day. I say it over and over – I don’t know how they did it!

I enjoyed making bread every week. But, I am currently trying to find a recipe for Potato Bread instead of the typical wheat flour recipes I had been using. I’ve been buying instead of making for two months’ time. IMG_20150607_125238013_HDR

I haven’t purchased sugar in over three months’ time. In the beginning of the project I wasworried about supply and running on fumes by the end of the week. That was also at the time I was following the meal planning booklets closely. We’re not eating desserts at the end of each meal. The worst craving was for Oreo cookies and with their invention in 1912, they actually were on the allowed list.

We have a huge (to our standards) “Victory” Garden. It’s a pain to keep up. During WWII people were encouraged to useIMG_20150607_130141634 every inch of lawn space for a Victory Garden. We’re only using about 1/8th of our yard for it and I can’t keep the weeds down.
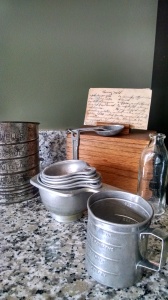
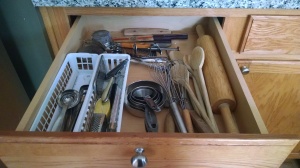
Plastic containers have left our kitchen for good. It didn’t take long to switch over to glass. I’m still using freezer bags in the freezer since I IMG_20150607_125310473_HDRcouldn’t come up with a better solution. Utensils were a challenge to replace and I have scrounged around antique shops and estate sales to repurchase non-plastic measuring spoons, cups, and such. One recipe booklet told me to use a rubber spatula to scoop something out of a jar. I was elated! I would easily nominate rubber spatulas as the greatest kitchen invention of modern time. Something so simple, right?

IMG_20150607_125521396It is rare for food to be thrown out. My mother is a master of leftovers and it’s taking me practice to get there, but I’ve greatly improved on food waste. The solution is to not buy things special for a recipe that I’ll only use once and don’t buy anything I don’t need, period. There is always a suitable substitute for ingredients, or you can omit (Use It Up, Wear It Out, Make It Do or Do Without).

I haven’t purchased cleaning supplies in six months. Yes, I still clean the house! Vinegar, Borax, baking soda, lemon juice/oil all do the job. For everything. When a t-shirt is beyond its wearable lifespan, it is cut up into four rags. Which can be rewashed.

We are eating a lot of chicken. Chickens weren’t plentiful during WWII, they were needed for eggs, but when we started following the recipes we were eating way too much red meat, even under the monthly rationing standards. I categorize this change as “When You Know Better”. It just didn’t feel healthy to be eating that way.

So, what do we eat?

Eggs. Chicken. Peanut Butter Sandwiches. Salads. Fruits. Vegetables – lots of potatoes. Ham. And, nobody is going hungry.

When I bake and cook I listen to the radio or music from the era. This point IMG_20150607_130519694made me realize I had been forgetting that every single kitchen I spent time in as a kid had a radio centered in the kitchen.
Back in December when people asked me why I was going to start the project I told them it was a study in contentment, resourcefulness, and mindful eating. I have to say, it’s been all of that. In very good ways. The next six months will march on; starting today I will make a commitment to shore up some of the edges that have become frayed as far as the rules go and see what else comes along. To Victory!

Spring Cleaning and Why I Won’t Be So Cross on Mondays

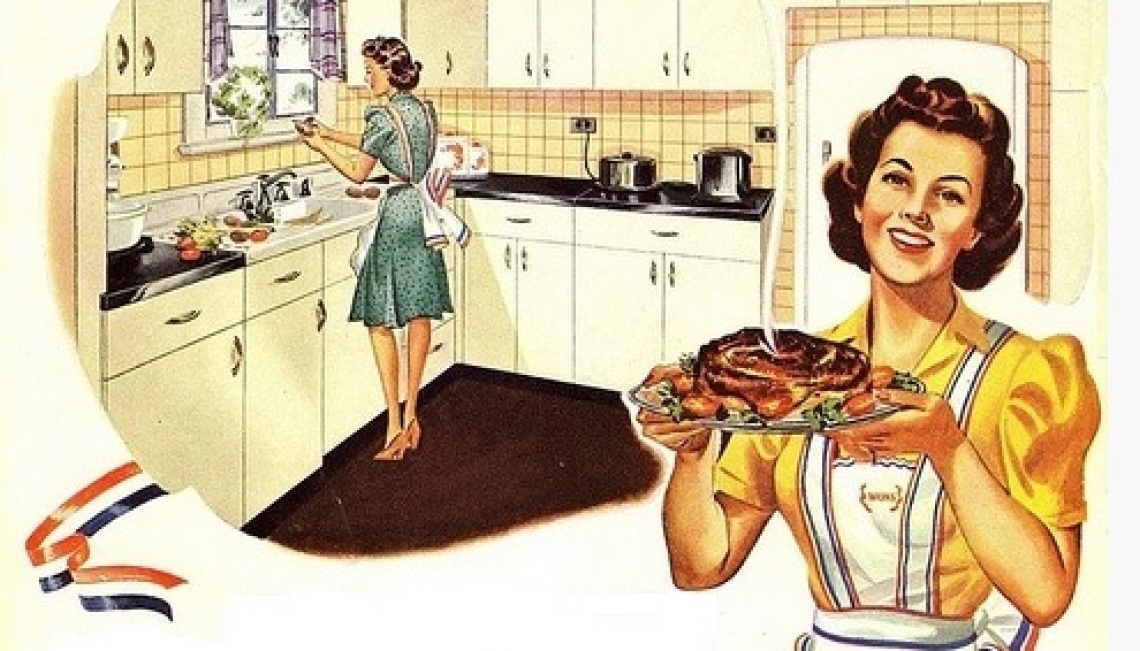
When it came time to take my kitchen cleaning back to WWII the list of cleaning supplies was pretty short. Household cleaning, especially during WWII, came down to some simple staples: vinegar, baking soda, salt, ammonia, bleach, Watkins supplies, Borax and Coca-Cola.  I had a picture in my mind that my grandmothers would have been using products we refer to as “green cleaning” today – natural and safe enough to put in food recipes also, but that wasn’t always the case.

Under the heading of “When You Know Better You Do Better”, came the emerging chemistry of cleaning supplies. Harsh cleaning chemicals were in demand as the country rebounded from The Great Depression and considered hospital-grade sanitation necessary at home.

Housewives were hearing the scientific name of the cleanser, as opposed to our “dumbed-down” advertised names today (carbon tetrachloride, anyone?). Advertisements went to great lengths to intelligently reason with the consumer and share the logic of buying the product.

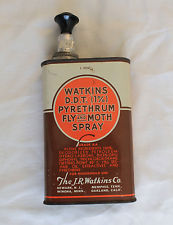
Watkins, known for medicinal salves and spices, devoted 90% of its production capacity to support the Allied war effort. To fill government contracts, Watkins produced dried eggWatkins DDTs, powdered juice packets, vitamin tablets, hospital germicide, DDT and insecticide powder.
Home use of DDT was popular. My Grandmother was a new bride in 1946, stationed with my Grandfather on a US Army base in Kentucky. They were enjoying a blissful, newlymarried life living in a tiny travel trailer. (When I say “tiny”, I mean really, really tiny.) Grandma wrote letters home in a constant stream and her adventures of living in the trailer are fun to read:

“I’ve got my dishes done and my house all cleaned up. Roy came home at 3:30 and had to be back by 4:30. He has to drive “his” jeep all night tonight and also tomorrow night. I was just going to do dishes when our next door neighbor poked her head out the window and said, “Honey, do you want to bake something in my oven?” So, honey said yes and I made a pumpkin pie, but not that easy. The recipe asked for ginger. So I went next door and asked for some, no luck; she said try next door, so I went there and she had some. Of course, they both asked me to sit down to stay a while so I’m getting to be just another old hen. Well, I got almost done and ready for the eggs. Boy, were they rotten!! Can you smell them up there?  So I hiked over to the neighbors and asked her for two eggs, stayed awhile and came home again. I just about got all done and I spotted where the ants were running. Just opposite the door under that window casing, so I ripped off a strip of board and some off the wall and got out the sprayer and DDT. Boy did they catch —. Big funeral tomorrow, my ants died. Now I won’t have anything to do! Ha! Ha! I got the pie done for dinner and was it ever swell! I made another curtain today, the one for the back window. The neighbor lady asked me to come over to bring my sewing and keep her company.”

From the same letters, I came to understand the enormous chore of laundry. Most cleaning product advertising from the time was devoted to the task. Suds were really important when it came to proving clean.

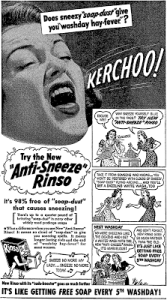
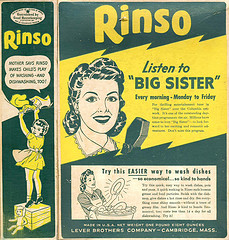
Rinso was the brand name of a laundry soap most commonly used in the United States and dated back to 1908. From 1936-1950 it was the first mass-marketed soap powder. It was advertised widely on radio, being the sponsor of many network programs such as the popularrinso daytime soap opera Big Sister from 1936 to 1946, and the night-time programs Big Town from 1937 to 1942, and The Amos ‘n’ Andy Show from 1943 to 1950. During this time the product’s advertisements happily chanted the slogan “Rinso white, Rinso bright” and boasted that Rinso contained “Solium, the sunlight ingredient”. Post-WWII, Rinso lost its market to Tide and tried to rebrand in the 1960’s, but disappeared from store shelves by the mid-1970s. Unilever, its manufacturer, replaced the name with Surf in the US (Rinso survives in Turkish, Asian, and Central American markets). But, don’t count a good thing out – in 1992, the 99 Cents Only Store brand purchased the rights to the name “Rinso” from Unilver for use in the US and Rinso brand cleaning supplies are now prominently displayed in their stores. http://www.gracesguide.co.uk/Rinso

I absolutely love the Rinso commercials played in movie theaters from the time:

http://aso.gov.au/titles/ads/rinso-easy-does-it/clip1/

http://aso.gov.au/titles/ads/rinso-soap-happiness/clip1/

Another letter entry from my Grandmother, “I got up at 6:30 this morning and did the washing. Gee what a wash! It wouldn’t be anything with a machine but oh this by hand stuff. I washed two sheets, about six bath towels, two pair Army pants, shirt, 2 tablecloths, 4 dish towels, that heavy red rug, and all our clothes besides. It took me about four hours.”


Change to DUZ for ALL 3 KINDS of War-time Wash!war-time-cleaning-duz

It’s Procter & Gamble’s Big Soap Discovery!

Got some work-clothes or play-clothes in your wartime wash? And less time than ever to do them? You need a new kind of soap to speed you through! You need DUZ!

War-time washes are extra dirty, too! Men folk on the production line . . . dirt from Victory gardens — from factory chimneys — it all adds up to trouble for you. Yes, you want a new kind of soap to do the job today — a soap that gets dirty towels really white and cleans grimy overalls easy. That’s DUZ. . . YOUR SOAP FOR EVERYTHING.

Yet In war-time— your clothes must last and last. Remember — you can trust even bright washable prints and pretty rayon undies to those fluffy DUZ suds! Yes— this amazing new kind of soap gets clothes as white as any soap made, yet it’s safer than any of the other 4 leading granulated soaps — definitely safer for colors, for your hands.

No cloud of “sneezy dust”. In DUZ— it’s amazingly sneeze-free. Be thrifty — buy the Giant size. One big red box does everything in an average wash for weeks! September 16, 1942

(Found  at : http://www.retro-housewife.com/1940-housekeeping.html )

Here is a rundown of the steps to clean laundry during the WWII era:

Soak: Soak cotton and linen articles in lukewarm soapy water, or in cold water with RINSO 1941borax, 2 tablespoons to the gallon. Soak handkerchiefs separately. Do not soak colored or wool articles.

Wash: Wring out the clothes from the soaking water. Wash with plenty of hot soapy water made with shredded washing soap, soap flakes or jelly. Use two lots if necessary. Rub dirty clothes gently on a wash board with your hand or a nail brush. Do not rub silks, rayons, and wool. Use only mild soap for them, and do not put them in very hot water.

Rinse: Soften hard rinsing water with borax. Repeat warm rinses till the water is clear, and add a little glue to the last water for white cottons and linens.

Dry: Dry outdoors when possible, but do not put silks and wool in the sun or too near the fire. Hang white cottons and linens in the sun to bleach. Dry colored articles in the shade, inside out.

Starch: The heavier and wetter the material, the more starch you need, and if you wring with a wringer you need thicker starch than if you work by hand. Starch articles inside out, using hot starch for white things and cold tinted starch for colored ones. Use blue to tint blue, cochineal for pink, coffee or tea for brown, and a vegetable dye for green. To mix starch, make a smooth paste with starch and cold water, using a wooden spoon, then add boiling water until the starch is clear.

Mangle: Leave clothes until quite dry, then sprinkle them evenly. Fold and roll up, and leave them for an hour before mangling or ironing. Pull garments into shape and put them evenly between the rollers, protecting any buttons.

Iron: The iron should be hot enough to splutter when touched with a wet finger, and you should iron as quickly as possible, continuing till the material is dry. To iron a garment, first go over all parts that hang off the board, then iron the center. To bring out a pattern or monogram, iron on the wrong side over a thick pad. Have a very hot iron for starched articles and a moderate one for silks and wool. Press damp knitted goods between flour sack towels.

Air: If you have no heated linen cupboard, hang straight, folded articles on a clothes rack, and garments with sleeves on hangers to air in the sun or near the fire. Source: Craig, Elizabeth. 1000 Household Hints. London